Saturday, November 24, 2012

How do you eat your Chow Chow?

I have friends who travel a few hours south of here every summer to pick the very best tomatoes, which they bring back to town and sell them.  The first year I learned of their tomato migration, I had them pick Roma tomatoes for me to can into sauce.  The following year, I noticed they had picked  a lot of green tomatoes, and I decided to get some and try a recipe for green tomato mince meat.....which is fabulous by the way.  This summer, with an interest in finding other recipes using green tomatoes, I decided to make Chow Chow.  We have quite a few friends who are transplants from the east coast who miss their Chow Chow since it is not something you can find on the store shelves out here in B.C.  Turns out I just couldn't make enough of this stuff.  Between mincemeat and Chow Chow....I used 40 pounds of green tomatoes this year and I am quickly getting to the end of my Chow Chow and Mince Meat.  I can tell already, next year, I could devote 60 pounds to Chow Chow alone.  I get it....this Chow Chow is tasty.....it's sweet (although you can adjust to your liking), and it tastes of pickling spice with a little bite from the vinegar.  I'm told it's nice served along side meat, on a cheese sandwich, and apparently straight out of the jar.  When you have some green tomatoes to use up....consider giving this a try.  If you are already a fan of Chow Chow....what do you eat it with?  I'm curious....

Chow Chow(makes 10 pints)

9 pounds green tomatoes washed
6 pounds onions peeled
Slice tomatoes and onions thinly ( I used a mandoline slicer) which makes the job very quick!  Set aside the sliced tomato and onion in a large bowl and sprinkle with 1/2 cup coarse pickling salt and mix in a little......cover and leave over night.
In the morning, drain in a colander and transfer tomato and onion to a large pot. 

Add to the pot:
4 cups pickling vinegar
2 cups water
1 red pepper cored, and chopped in 1/4 inch squares
7 cups white sugar (or less to taste)
a spice ball or piece of cheese cloth filled with 2 tsp mixed pickling spice

Put pot on medium high heat until bubbling.  Reduce heat to a simmer and cook until vegetables are tender. (this will take 10 -15 minutes)  Remove 1/2 cup of liquid from the pot and set aside to cool.  Once cool ....

Add to the cooled 1/2 cup of liquid:
1/2 cup corn starch
2 tsp dry mustard
1 tsp turmeric
Whisk this mixture smooth, then stir it into the Chow Chow to thicken.  Once the cornstarch mixture is added, you must stir the Chow Chow often to make sure it does not burn on the bottom.  Cook a further 15 minutes on medium low heat stirring frequently.  Remove spice bag.  Fill sterilized canning jars to within 1/4 inch from the top.  Seal and process in a hot water bath.

Sunday, November 18, 2012

Where did the Time go?

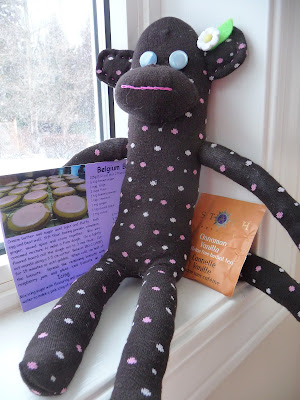
It has been very busy here with work and life in general....But I did take a week off work with no place to go.  Tomorrow is back to work for me, and while I don't feel like I accomplished quite enough on my week off, it wasn't unproductive either.  I managed to get a few swaps prepared and mailed like the felt ornament above.......and the sock monkey below.
 And even managed to finish up and mail some quilt blocks for some nice ladies preparing quilts for the Hurricane Sandy Help quilt project.  The blocks were super simple and I may be tempted to pull out all my vintage sheet fabric to make a lap quilt using this pattern.....just to see how it turns out.
I also took a trip to the yarn shop and bought some beautiful Malibrigo chunky to knit a hat....just need to sew in the yarn tails .....almost finished.......and am just about to start on a knit shawl.  Once they are done, I'll be sure to post a picture......lots to catch up on....and Christmas is coming!  Yikes...

Saturday, November 3, 2012

Mom Makes Yogurt


These past few months have been busy.....you may have guessed.  I have lots to catch up on.  While accompanying my father to a surgery in London, my mother got addicted to the yogurt served at the hotel she was staying at.  Once home she set about recreating it on her own.  After 8 batches now....she is pretty sure she has got the recipe down.  It is now on my' to try' list:)  Perhaps you might like to try it as well.  Here are my mother's instructions....
Greek Yogurt in a Slow Cooker
1 litre whole milk
1/4 cup whipping cream
2 tablespoons Greek "Skotidakis" plain yogurt (Safeways) or your favourite plain yogurt that has active culture in it
3 teaspoons liquid honey
Small sized slow cooker

Put milk, and whipping cream into slow cooker. Blend liquids with a whisk. Turn slow cooker to "Hi" and heat just to 180 degrees F.
This will take about one hour, however, check at 45 minutes with a thermometer as it rises quickly near 180 degrees. When temperature is reached, immediately transfer to ice cold water bath in the sink until temperature falls to 120 degrees.

Remove insert of cooker from sink to the counter. Arrange a folded tea towel under it to absorb water from the sink. When milk temp reaches 110 degrees, take out a half cup of milk and add the 2 tablespoons plain yogurt. Whisk to blend and add back to the milk in the slow cooker. Put the lid back on and wrap slow cooker insert with a large bath towel. Lower the grill in your oven and turn the oven to lowest temperature for 15 seconds just to get a blast of heat to the oven. Shut off immediately; place a thermometer laying flat on bottom grill just so you can read the temp. It will probably show 100 - 105 degrees. This is ideal. Place the towel wrapped slow cooker insert with the milk inside the oven. Shut the door and do not peak for four hours.


After four hours remove from the oven. The yogurt will have finished the fermentation process; it will be one solid mass and it is ready to be poured into a cloth over a colander. I used an old white clean t shirt front. Lay the cloth over the colander and over a large pot; pour entire contents on to the cloth. Bring up four sides and secure with twine. Leave to let the whey drip into the pot for two hours.

After two hours remove twine, open the cloth and empty the yogurt into a large mixing bowl. You will want to add back two or three tablespoon of whey back to the yogurt and blend this in with a Bamix or hand mixer. Keep adding a little more whey until you get the exact texture of yogurt you are after. It should look like a smooth meringue or whipped cream. If it's not creamy and light beat it a little longer.  It will have a nice gloss. It will look awesome!!


At this point remove two or three tablespoons of culture to keep refrigerated for you next batch of yogurt. It will keep refrigerated for a week to ten days with a tight lid in a small tupperware container.

After reserving a few spoons for the next batch, add three teaspoons of liquid honey and whisk/blend this in well. It will give a smooth taste, unlike any commerically purchased yogurts available from the market.

The yogurt is ready for serving but the flavour will be enhanced when chilled in the refrigerator. Store in a tightly sealed container. Keeps one week to 10 days refrigerated.

Sunday, September 23, 2012

Peruvian Roast Chicken

My DH faithfully tapes episodes of America's Test Kitchen on our PVR and we watch them when we find the time.  This recipe caught my eye and we decided to give it a try.  I would recommend it highly....You might like to cut down on the amount of salt if you don't like salty things.  While we were fine with it here, my mother made this recipe as well and felt she would cut back on the salt the next time around.  If you'd like to give it a try, make sure you have adequate time for the chicken to marinade....over night is best.

Peruvian Roast Chicken
3 T Extra Virgin Olive Oil
6 cloves garlic
2 Tbsp salt (kosher)
1 Tbsp pepper
1 Tbsp cumin
1 Tbsp sugar
2 tsp oregano
1/4 cup mint leaves
2 tsp lime zest
1 habenero chilli

Combine all in blender and process to a smooth paste.  Lift and separate the breast skin  away from the meat so you can get the marinade under the skin. Smear rub all over the skin of the chicken and place in a ziploc bag in the fridge to marinate for at least 6 hour or over night....time permitting.  Preheat oven to 325 F.  Roast chicken using a vertical roaster or on a beer can for about 40 minutes or until the internal temperature is 140F.  Remove from oven and increase heat to 500F.  Replace chicken continue to roast until chicken is nicely browned and reaches an internal temperature of 160F.  Serve with Spicy Mayo Sauce.  You can also make this recipe as I have with 1/2 chickens, or with chicken pieces.
Spicy Mayo Sauce
1 egg
2 Tbsp water
1 Tbsp lime juice
1 Tbsp minced onion
1 Tbsp fresh cilantro
1 tsp mustard
1/2 tsp kosher salt
1 garlic clove minced
1 Tbsp minced pickled jalepeno pepper
1 cup olive oil
Puree all but the olive oil in a blender.  With the blender running, slowly pour in the olive oil as if to make a mayo.  Consistency is slightly thinner than mayo, and can be poured.  Serve over chicken.


Wednesday, August 15, 2012

Chocolate Peanut Butter Surprise Cookies

Last night I tried a twist on a favourite peanut butter cookie recipe.....adding cocoa to the mix to make the cookies chocolate.  They look deceptively like chocolate cookies with m&m's in them......the peanut butter is a  nice surprise when you bite in:)  Normally I would add white chocolate chips to the chocolate cookie dough.....but in this case, I thought the m&m's would look more fun.  It's an easy recipe to remember with pretty basic ingredients.  I can vouch for the goodness of the dough, and unfortunately cannot tell you how many cookies a full recipe should make due to an ample volume of missing dough:)  Don't over bake these and you will have a nice chewy chocolate cookie.
Chocolate PB Surprise Cookies
makes more than 48 cookies

1 cup butter or margarine softened
1 cup peanut butter
1 cup brown sugar
1 cup white sugar
2 eggs
1 tsp vanilla
2 cups flour
1/2 cup cocoa
1 tsp baking powder
1 tsp baking soda
1 cup m&m's

Preheat oven to 350F.  Cream, butter, sugars, and peanut butter.  Mix in eggs and vanilla.  Combine all dry ingredients (not the m&m's) and mix into the creamed mixture.  Stir in the m&m's to distribute evenly throughout the dough.  Chill dough in fridge for 30 minutes.  Drop by rounded teaspoonful onto a nonstick pan and bake at 350F for 7-10 minutes.  I bake at 350F in a convection oven for 7 1/2 minutes.  Remove from oven and let set for 3-5 minutes before transferring to wire racks to finish cooling.

Thursday, June 28, 2012

An Amazing Kids Party

I'm not sure how my son decided that this year he wanted to have an Amazing Race Party for his birthday.  We don't really watch the show....but I understand the general idea.  My friend Alison had and talked about an Amazing Race party for her son Andrew several years ago now....so I did have some ideas on where to start.
Although I really tried to start the preparations far in advance, there always seems to be so much left to the last minute.  I found a great site that had printable clue sheets that you could put your own information into and that proved to be most helpful.  The biggest challenge for me was to come up with challenges that did not require someone to witness them.  In total we came up with 14 challenges which took the teams about 1 1/2 hours to complete.   I learned a lot, and would change a few things if I were to do it again, as some challenges which I thought would be quite straight forward were difficult and others were just the opposite.  I had hoped to use the YUDU screen printing machine to make special team t shirts for the kids to keep, but due to my typical last minute panic attack decided to  just use plain coloured t shirts.  By far the most entertaining challenge was the baby food challenge where the teams had to pick a member to eat a randomly selected jar of baby food ranging from strawberry dessert, to spaghetti, vegetables and meatballs.  
It appears that all flavours were texturally offensive, and the team that got the strained pears......could not finish......while the team with the pureed spaghetti managed to pull it off.  Our entire weekend was under a severe thunderstorm warning, but we lucked out with beautiful hot weather with no rain.  I had super cheap Canadian flag back packs which gave a spot for the teams to keep their clue sheets, pens and snacks while they raced.....I even found some dollar store rain ponchos....just in case.
I'm pretty sure the kids all enjoyed the party.....even though one team got stumped for over 45 minutes not being able to find the 'travelocity gnome'......in a little green space in the neighbourhood. 
We ended with lunch and cake, and a 'fill your own goodie bag' with selection of toys and candy.

 If anyone is wanting to host their own party and is interested in the clues we used, just let me know and I can list them here.
Update....here are some of the challenges we used:
Events for the race were:1)  choose 1 team member to eat a jar of randomly chosen babyfood....there was a 50% split between dinner choices, and dessert choices  2) Choose 1 team member to eat  cookies from a tray until they find one with a gnome game piece hiding under it....we had a 24 muffin pan filled with dollar store 'oreos' with 3 of them hiding a gnome picture underneath  3) Assemble a 30 piece puzzle, flip it over to answer the question written on the back ....question was "what is the colour of the house at 1234 Carlisle Way"  4)   Challenge ...team takes turns shooting hoops until they shoot 6 baskets.....or taking turns, roll the die until they roll 12 sixes.  5) With a riddle to lead them to the school yard....count the number of wooden butterflies on the fence, write down the school address, and count the number of swings at the school.  6) Find examples of six different kinds of trees 7)  Collect and return 50 dandelion flowers 8)  With a clue to lead them to the school garden...dig up and return with buried treasure...we had buried 20 gold toy coins in ziploc baggies in the kindergarten digging bed at the school.  9)  With a riddle to lead them to a neighbourhood green space....find the name of the gnome hiding in the woods...we had written Norman on the bottom of the gnome.  10)  Match the pictures of the Provincial flags with the names of the Provinces.....time was added to their score for each wrong answer.  11) A page of three riddles with time added for each wrong answer  12)  Count the number bricks in the garden wall.  13)  Count the number of spindles in the back deck.

Wednesday, June 27, 2012

Rhubarb Custard Bars

Today is the last day of school here, and I wanted to send in a little something for the staff to say thank you for all their work this past year.  It has been a trying year here to say the least.  With the teacher's contract negotiations going on, normal routines were disrupted and an embarrassing lack of communication caused frustration and friction for a lot of people.  Hopefully all will be settled for the start of the new school year in September. I chose to try my second batch of Rhubarb Custard Bars.  I neglected to take a photo when I made the first batch the weekend before last for Ike's scouting group.  It was pretty well received and I had heaps more rhubarb so I thought I'd give myself another chance to take a photo.  Well I did manage to take one last night while the bottom  layers were just about to go back into the oven, but I did not get to take one with the topping layer on.  When I make it again, perhaps I'll add a finished photo for the sake of completeness.  Just so you have an idea of how it tastes......the bottom is sort of shortbreadish, with a rhubarb custard middle layer.......all topped off with a cream cheese frosting that is significantly lightened up with the addition of whipped cream.  It is definitely not low in calories........and is most definitely on my make again list.....so another photo will come along some day.
Rhubarb Custard Bars
Pastry
2 cups flour
1/4 cup sugar
1 cup cold butter

Filling
2 cups sugar
1/2 tsp nutmeg
7 tbsp flour
1 cup whipping cream
3 beaten eggs
5 cups rhubarb

Topping
1 (8oz package) cream cheese softened
1/2 cup sugar
1/4 tsp orange extract
1 cup whipping cream

Preheat oven to  350F. and grease a 9X13" pan.
Cut pastry ingredients together until the size of coarse crumbs.  Press lightly into the prepared pan and bake for 10 minutes.
While the pastry bakes,  Combine sugar, nutmeg, and flour.  Whisk in cream and beaten eggs.  Fold in the rhubarb.  Pour this mixture over the baked crust and return to the oven to bake for another 40-45 minutes or until the custard is set (when a knife inserted in the center comes out clean).
Cool completely.
Beat the cream cheese, sugar and extract together until smooth.  In another bowl whip the cream, and then fold the whipped cream into the cream cheese mixture.  Spread this onto the completely cooled cake and store in the refrigerator.

Tuesday, June 19, 2012

Jaffa Cookies

A little baking was required to fill the cookie jar for snacks and lunches.  As always, it is a bit challenging to find new recipes to try which sound interesting, and which contain no nuts so that they can be taken in the school lunchbox.  This time, I decided to try Jaffa cookies.  I love the flavour of Jaffa cookies so I decided to give these a try.  Essentially these cookies are an orange flavoured chocolate chip cookie.  If orange and chocolate is a flavour combination you like, you may well like these cookies as well. 

Jaffa Drop Cookies
1/2 cup butter, softened
3/4 cup sugar
1/2 tsp orange extract
1 egg
1 1/2 cups flour
1 tsp baking powder
1/2 cup chocolate chips

Cream butter, sugar orange extract together.  Beat in egg.  Combine flour with baking powder and mix into creamed mixture.  Stir in chocolate chips.  Drop by rounded teaspoon onto  cookie sheet and bake at 350 F until cookies begin to become golden around the edges....about 8 minutes.

Sunday, June 10, 2012

Paul's Buttermilk Pikelets

What to make for a quick snack when you have neighbours popping by with kids???  I had a pan of Peanut Butter Marshmallow squares already made, but needed a little something for foodish and less dessertish.  Pikelets fit the bill....especially for little kids.  I had a bit of buttermilk needing to be used up, so I had a little internet search and found a recipe for Paul's Pikelets that called for the exact quantity of buttermilk I wanted to use up.  Now it is sheer coincidence that I realized that the Paul in the recipe is refering to the dairy company Paul's sold in Australia and not to the author of the recipe.  The recipe is quite heavy on the sugar making the Pikelets sweet enough to eat without jam or other toppings....but you try it on your own and decide for yourself if you'd like to cut back on the sugar.

Paul's Pikelets (serves 4)

1/2 cup sugar
2 eggs
1 cup buttermilk
1 1/4 cups self raising flour
1/4 tsp baking soda
pinch of salt

Beat together the sugar and eggs.  Add buttermilk and beat a further minute.  Sift remaining ingredients and fold into the batter.  Try not to over mix.  Drop by spoonful onto a greased hot pan, turning to cook the second side when bubble break the surface of the batter. 
Note: if you do not have self raising flour you can mix your own by adding 1 1/4 tsp baking powder and 1/4 tsp of salt to 1 cup of all purpose flour. Or in this recipe, as written, omit the pinch of salt, use all purpose flour instead of self raising, and add 1 1/2 tsp of baking powder.

Tuesday, May 29, 2012

Super Simple No Bake Marshmallow Squares

If you like peanut butter.....like I like peanut butter.....then you probably already love Peanut butter marshmallow squares.  They are so simple, a recipe seems unnecessary.  However, in the interest of having it recorded here for future use.....I will write it down here.
This is one of my weaknesses on the treat tray when we have lunch brought in for a meeting.  When the dessert trays are put out....I always make a quick scan to see if one of my favourites is hiding in the mix.  If I find these, or Naniamo Bars, or Butter Tarts.....my diet for the day is most surely blown.  It seems to me that these bars must have been designed for kids with their colourful fruity marshmallowy super sweetness.  Take a hint here that a small piece goes a long way.  Even my Ike has a hard time eating a large piece of this.  Be warned...if you have never tried them....they are sweet.  But if you love all things peanut butter, you simply must give these a try.

Marshmallow Peanut Butter Bars

1/2 cup butter
1 cup smooth peanut butter
1 (300g) package of butter scotch chips
1 (250g) package of fruit flavoured mini marshmallows
3/4 cup shredded coconut (optional)

Over medium heat, melt the first 3 ingredients stirring until smooth.  Once smooth remove from heat and let cool slightly.  Add marshmallows and coconut if desired, stirring to coat.  (Most often I have seen this slice without coconut).  Pour into a greased 9X13 inch pan and put in the refrigerator to set up.

Tuesday, May 22, 2012

Finished Project

For one reason or another....a bit of crochet has been what I have been picking up to work at when I have a chance.  I have finished up several more cute if not so useful apple jackets......and this vintage hot mat as well.  The pattern has been around a long time and I have seen several made of this pattern over the years.....but had never owned one.  This one was made with no one in mind.........so, for now I will look at it now and again.  If any one likes yellow, just let me know.  It's yours if you'd like it!  It's 5 1/4 inches square, double layered, and a nice little spot to set down your teapot.  If you'd like to make one of your own, the pattern is right here.

Saturday, May 19, 2012

Gone in a flash......Brownies

I could barely snap a photo of this brownie before I was down to the last slice.  So I made one more pan...I still wanted to take a better photo and I am finding myself down to the last row in the pan......again.  I cannot seem to keep up with the pace of eating this one.....i give up.  It is a handy brownie recipe to keep on file as it requires only cocoa powder.......no melted chocolate.  It is super fudgy too which is two thumbs up in by books.  I highly recommend you try just one piece of this one.......I dare you to try just one;) I would also recommend this recipe as a very good recipe for your kids to try as it is all in one bowl with no fancy instruction.

Brownies (brownie recipe from Mennonite Girls can Cook)
3/4 cup butter or hard margarine (melted)
1/2 cup cocoa
2 cups brown sugar
2 eggs, beaten
1 tsp vanilla
1 cup flour

Melt butter or margarine and mix in the cocoa powder until smooth.  Now do the same with the sugar.  Mix in the beaten eggs and vanilla, and finally stir in the flour.  The batter will be thick, but do your best to spread this into a well greased 9X13 inch pan.  (I will next try this in a 9X9 pan as these brownie are pretty thin).  Bake at 350F just until a toothpick inserted in the center of the pan comes out clean.  In my convection oven, that is about 20 minutes.  Original recipe calls for 30 minutes of cooking time.....but I like err on the side of gooey when it comes to brownies.

Monday, May 14, 2012

Rhubarb Lunar Cake

We had perfectly lovely weather this weekend for Mother's Day, and it was a very busy weekend as well.  On Saturday Ike was in the May Day parade with his scouting group, and Sunday the scouting group went to the movies.  It was beautiful weather for a bit of yard work too.  While Ike was enjoying the movie, we took the opportunity to go shopping for bedding out plants for the yard.  Gladiolus are now planted, black currant pruned, rhubarb and sour cherries fertilized and I was pretty pleased to find a different sour cherry shrub that I've been looking for on sale!  After a very satisfying and somewhat productive weekend, we needed a little something sweet for lunches for the upcoming week.  With rhubarb season just around the corner....I thought I'd better use up some of the rhubarb still in my freezer from last year.  And what better than a Rhubarb Lunar cake.......simple, quick and yummy too.  This is a nice homey dessert to bring to a pot luck or picnic or to put away and freeze.  Also nice served warm with a scoop of vanilla ice cream or with pouring custard.....or just on its own.

Rhubarb Lunar Cake
1/2 cup butter or margarine, softened
1 1/2 cup sugar
1 egg
1 tsp vanilla
2 cups flour
1 tsp baking soda
1/2 tsp salt
1 cup buttermilk
2 cups chopped rhubarb
1 tbsp flour
Topping
1/4 cup butter or margarine
2 tsp cinnamon
1 cup brown sugar packed

Cream together softened butter and sugar.  Mix in egg and vanilla.  Sift flour, baking soda and salt together into a separate bowl and add them alternately to the creamed mixture with the buttermilk in thirds.  Toss the rhubarb with flour and stir into the batter.  Pour into a greased 9X13" pan and level out the batter. (Batter will be fairly stiff).  Mix together topping ingredients and sprinkle evenly over the top of the batter.  Bake in a 350F oven for 30-45  minutes or until a toothpick inserted into the center of the cake comes out with a few crumbs attached, but no wet batter.

Monday, April 30, 2012

a little WIP

I signed up to work on a project that I was very much interested in.  Well...much time has passed now and I am starting to make progress finally:)  My son has been having a lot of fun helping with this too and it has been really a very relaxing project as it is not critical  how things progress or turn out.  I think I am really going to like the end result and I have been enjoying working with paper for a change.  More on this one later.......What are you working on???

Sunday, April 29, 2012

Apple Cozy

I have been contemplating getting a subscription to Mollie Makes magazine off and on now for almost a year.  I had forgotten all about it until another swapper from Swap-Bot mentioned it.  When I looked into the price, however, it really made me think.  It is super expensive!!  I did purchase the latest issue off of the magazine racks this month.....so for now I will still keep thinking about it.  Although, I much prefer to hold on to a magazine.....the price reduction of the digital issue is marginally easier to swallow.  We shall see.  Before I picked up the issue that I did purchase......I tried out this cute pattern for a cozy apple jacket from a previous issue.  I am finding that I nearly always need to use a larger hook as my tension must be very.....tense:)  After two do overs with larger hooks.....finally I found one that worked up to the right size!  While it may not be entirely very functional....it certainly is fashionable:)  It almost makes me want to bring an apple to work......

Monday, April 2, 2012

Texas Sheet Cake ...Nice and Easy

There it is....the last piece of a Texas Sheet cake that DH insisted that I make.  The recipe is from one of his favourite cooking shows.  A show that he likes to watch.....and then say...'Why don't you make that??'  I already have a Texas Sheet Cake recipe that I very much like.....but who am I to argue.....Honestly I could have made my usual recipe and he would not know the difference.  But, in the interest of trying a new recipe....I gave it a go.  I can say that I like it equally as much as my previous recipe.  It is very easy to prepare and makes a nice large amount to share.
Cook's Country Texas Sheet Cake
8 oz semi sweet chocolate
4 Tbsp butter
3/4 cup oil
3/4 cup water
1/2 cup cocoa
Melt all above ingredients in a pan over medium heat.  Stir until smooth.....should take 3-5 minutes. Remove from heat and cool a few minutes.

2 cups flour
2 cups sugar
1/2 tsp baking soda
1/2 tsp salt
Mix together all dry ingredients, and pour above chocolate mixture into the dry and whisk together.

2 eggs
2 egg yolks
2 tsp vanilla
1/4 cup sour cream
Whisk together the above 4 ingredients, and stir into the previously mixed ingredients from above.
Spread batter into a greased cookie sheet with sides.  Bake 18-20 minutes at 350F on the middle rack.

Icing
Prepare frosting while cake is in the oven.
1/2 cup cream
1/2 cup butter
1/2 cu cocoa
1 Tbsp corn syrup or golden syrup
1 Tbsp vanilla
3 cups icing sugar

1 cup chopped pecans or walnuts to sprinkle on top if desired.

In a medium pan heat and whisk the first4 ingredients until melted over medium heat.  Remove from heat and add vanilla and whisk in the icing sugar.  Frost cake with icing while the cake and frosting are still warm.  Sprinkle the top of the icing with 1 cup chopped pecans if desired.

Tuesday, March 20, 2012

A Quick Mug Rug

Another sewing swap went out the door this past weekend.  The swap was for a 'Mug Rug' which is a little spot to put down your coffee or tea with a wee bit of extra room for something else.  Don't worry, I'm not going to try and eat that egg.....it is well past what I would call fresh....it's strictly decorative.  
It was a busy weekend around here, but I did manage to get this swap out just in the nick of time.  Lots going on and lots coming up too.  We are planning a little extended long weekend visit to the Prairies to visit with friends and family while Ike is on his spring break.  That way, Ike will not miss any school, and I can get back a few days of worked overtime.  
Anyway, this little swap was quite a cute one.....and it gave me a chance to try free motion quilting which is something I have been putting off.....dreading actually.  As with many dreaded experiences, its bark was much worse than its bite.  It was....in fact.....quite fun!  So.....I am looking forward to trying it again.....soon!  Certainly, my first try at it was not without mistakes.....but it was no where near as difficult as I had imagined it would be.  The pattern and tutorial are right here....and just in time for a quick Easter gift too!  Seriously....it will be done in an hour.  I will try it again with a thicker batting, I think, and maybe with some binding.  I always think things look better with a binding don't you??

Sunday, March 18, 2012

Arepas

After having a conversation with one of the moms at my son's school about celiac's disease......I spent some time on the Internet investigating gluten free options.  At some point I came across many delicious looking photos of arepas.  I had never heard of them before, and they seemed to be so very popular???  They are very popular in Venezuela and Columbia and are a corn based staple bread.  I know I have seen the flour required to make these in the grocery store at some point....so my search began, and my interest  grew.  Yesterday, I accidentally found the corn flour and just had to pick some up to give these a try.  I made only a half recipe (right off the package) since I didn't know how well they would keep...or how well they would be liked.  I can see from my first experiment this morning that I need to make them a little bit thicker, and I have not yet figured out the baking time in the oven.  Even thought they were a little thinner than they should have been...the flavour was nice and since they are quite quick and easy to make...I will most definitely be up to a little more arepa experimentation.  Once cooked, the arepas can be filled with almost anything you like.  Meat, beans, cheese and eggs seem to be popular choices.  If you are on a gluten free diet.....this may be your new favourite bread!  We tried them with melted cheese and scrambled eggs.
Arepas
2 1/2 cup warm water
1 tsp salt
2 cups arepa flour

Mix warm water, and salt.  Add P.A.N. pre-cooked corn meal and mix to a stiff dough.  Let dough sit 5-10 minutes.  Divide dough into 8 equal pieces.  Form into balls and flatten to a thickness of 3/4 inch.  Fry in a lightly greased, medium heat pan about 4 minutes per side to get a crisp exterior on each side.  Transfer to a baking sheet and bake at 400F for 10-20 minutes until they sound hollow inside when tapped.  Serve while still warm.  Split arepa and fill with desired filling.

The dough should not be so wet as to stick to your hands, nor so dry that it cracks at the edges when you form it into a disc.  Add a water to dough just by wetting hand while forming the discs or work in more flour as needed.

Tuesday, March 13, 2012

Easy Fruit Muffins

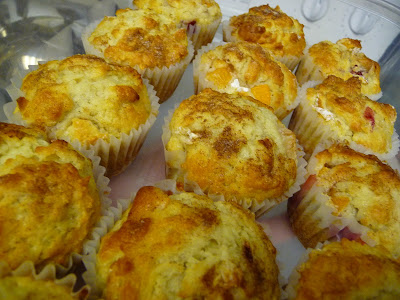
With presentations to do at work this week, I was in search of a new muffin recipe to bring into the customers.  I decided to give this recipe a try mostly because I had a cup of fruit cocktail in the fridge that needed to be used up.  It turned out to be a nice choice and I was pleasantly surprised.  They were moist, just sweet enough, and nicely flavoured by all the bits of fruit.  Nice for change over my usual muffin choices of carrot muffins or bran muffins.  If you have some extra fruit cocktail kicking around, you might like to give them a try too!

Fruit Muffins(adapted from Company's Coming Muffins and More)
Makes 16 regular size muffins
2 cups flour
1 tsp baking powder
1 tsp baking soda
1 tsp salt
1/2 cup butter
1/2 sugar
1 egg
1 cup milk
1 cup diced canned fruit, drained

In a large bowl, mix the dry ingredients together and set aside.  In another smaller bowl, cream butter and sugar and then the egg.  Mix in the milk, vanilla, and the fruit.  Make a well in the dry ingredients and pour in the wet ingredients. Mix together, just to moisten. Do not over mix. Batter will be lumpy.  Fill greased muffin pans or use paper liners.  Fill to 3/4 full.  Bake in 400F oven for 20-25 minutes or until tops spring back when touched.  Remove from oven and let rest 5 minutes before removing from pan.

Saturday, March 10, 2012

Snickerdoodles....the second try

It has been a quiet Saturday morning here as Ike is off camping with his scouting group.  The camp they are using on this outing is very close....maybe only a 15-20 minute drive from our front door.  We were asked to send along some type of snack to share, and since his departure Friday after work was going to be a little rushed, I decided to make Chocolate Puffed Wheat Squares.  They are quick and easy and most kids like them.  After popping out two pans of those, I decided to make the dough....at least, for Snickerdoodles.  I had made these quite a few years ago and did not really care for them too much.  Since I had, earlier this week, been discussing these cookies with a lady who declared them to be her all time favourite cookie....I decided to give them one more try.  From my discussion with the Snickerdoodle lover I sort of figured that I must have over baked mine on my initial try.  So here I go again, and I'm really glad I did.  When baked with a crisp exterior (just as the outside edges begin to brown) and  chewy interior.....they are pretty addictive.  Essentially they are a sugar cookie that is not rolled and cut.  What could be easier??  I was completely out of cinnamon, so I ended up using poudre douce instead which is predominantly cinnamon anyway.  Lots of baking going on this weekend....and this is my start.  I hope your weekend is going well!
Snickerdoodles (adapted from AllRecipes.com)
1 cup margarine or butter, softened
1 1/2 cups sugar
2 large eggs
2 tsp vanilla
2 3/4 cup flour
2 tsp cream of tartar
1 tsp baking soda
1/4 tsp salt

Roll cookies in a mixture of:
2 Tbsp sugar
2 tsp cinnamon

Preheat oven to 375F. Cream butter and sugar until smooth, add vanilla.  Beat in eggs one at a time.  Mix all dry ingredients together and mix into creamed mixture.  Chill dough 1 hour.  Roll in to 1 1/2 inch balls, and roll those balls of dough into the a mixture of cinnamon and sugar.  Place on cookie sheet 2 inches apart.  Flatten each cookie with the bottom of a glass only slightly.  Set timer for 7 minutes.  Remove from oven when cookies are beginning to brown on the edges, somewhere between 7-10 minutes depending on your oven.  Let sit one minute on cookie sheets before transferring to racks to cool completely.

Tuesday, March 6, 2012

Hello...What are You up to??

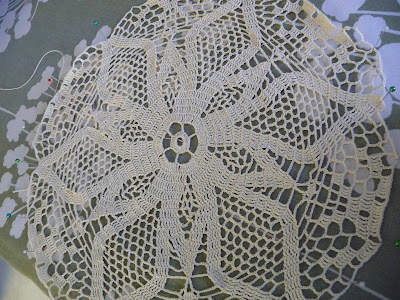
Well..just checking in to say that I have not yet given up on my first doily project.  You can see from the photo that I have made some progress.  While talking on the phone to my mum the other day, I decided that I should pin out this thing to ensure that it is actually going to lay flat and be at least somewhat roundish at some point.  The cute part of the pattern is just starting to come into view now.......Can you tell what it is??  Probably hard to see just yet......You'll have to wait for another update photo!  Just for a sense of scale....it is now about 14 inches across and should be about 20 inches across when (if) finished.  It has got some uneven tension that I hope will sort itself out in blocking....if it's not too bad that is.  Keeping my fingers crossed.  It is my first real thread crochet doily so I am trying to keep my expectations low to avoid disappointment.  So far.... so good!
I've also been working away at a little swap project that has given me a prime opportunity to try free motion quilting for the first time.  As with so many things...the anticipation of trying this for the first time was much worse than the actual experience.  Again...it's not perfect, but it's only the first time I've tried it.  At least now I'm not afraid to try it again.  So...what have you been up to??

Tuesday, February 28, 2012

Chocolate Malt Cookies with Cranberries

Another weekend is over....  I like to think I accomplished what I needed to, and one of the things on my list was to make some baking for lunches in the week ahead.  This is a bit of tweaking of my favourite basic chocolate chip cookie recipe.  They offers the same chewy goodness with a lot of chocolate flavour and some cranberries added for good measure.  They really are nice with a glass of cold milk:)  You really should give them a try.
Chocolate Malt Cookies with Cranberries (and Chocolate chips)
1 3/4 cup butter softened
1 cup light brown sugar
2 cups sugar
2 1/2 tbsp malt extract
2 eggs
1 tbsp vanilla
2 tsp baking powder
2/3 cup cocoa powder
3 cups flour
1 cup dried cranberries
2 cups chocolate chips
Cream together the butter, and sugars.  Mix in the malt extract, eggs and vanilla. Mix in baking powder, cocoa powder and flour to combine.  Stir in cranberries and chocolate chips.  Chill dough for 1 hour in the fridge before baking.  Scoop by rounded teaspoonful onto nonstick baking sheets and bake for 7-8 minutes at 350F.  Try one or two cookies first on their own to get the timing right.  7-8 minutes should produce a cookie with a chewy center.  Longer baking will make a more crisp cookie.  Store in an air tight cookie tin.

Sunday, February 26, 2012

Kettle Corn...Sweet and Salty

Ike's class was asked to bring in snacks to share for their Valentine's Day party earlier this month.  He decided that he wanted to bring popcorn for his contribution.  While examining the choices of pre-made popcorn in the grocery isles....I quickly decided that this was going to be too expensive for what he would be getting.  We opted to make our own to bring in and some seasoning flavours for the kids to pick their own.  Now usually we eat popcorn straight away, so I was on the internet looking for some suggestions on how to store popcorn made in advance.  Quite accidentally I found the Rachel Ray recipe for Sweet and Salty Kettle Corn.  I was intrigued by this flavour option as I had not ever tried to make it before, and it seems to be very popular with most of the neighbourhood here.  It turned out to be exceptionally easy, and pretty yummy too.  It was so easy to make....all you need is a bit of oil, a pot, some popcorn, sugar, and salt......and of course 4 minutes of your time.  I reduced the amount of oil in from the original recipe as it was not needed as far as I could see.
Quick and Easy Kettle Corn
2 1/2 Tbsp vegetable oil (we used canola)
1/2 cup popcorn kernels
1/4 cup sugar
salt to taste (we used about 3/4 tsp)

In a lidded pot, heat oil and popcorn kernels on medium high heat.  Once the oil begins to sizzle and make a bit of noise, add the sugar.  Keep the kernels moving by shaking the pot gently so they do not burn from kitting in one spot too long. Soon...in a few minutes, the popcorn will begin to pop.  Continue to shake the pop gently to keep the up popped kernel at the bottom and to keep the popped ones from burning.  When the popping slow down to just a few pops here and there, remove from the heat and transfer into a large bowl.  The kernels will be a bit sticky from the melted sugar.  Sprinkle to taste with salt while stirring to distribute the salt evenly.  Once the popcorn cools a bit it will not be sticky.

Sunday, February 19, 2012

A Mango Loaf

This little loaf recipe has been on my to do list for a little while now.  My mum has been telling me about it for quite some time now.  As each recipe makes two loaves....she has made over 40 loaves of this now.  Well...I just had to try it now didn't I??  Last weekend as part of my very productive weekend....I had a chance to give it a try, and it was really quite yummy!  I am planning to make it again and I have already got another can of mango waiting...so I'll be ready.  Although it contains mango, it is not a very over powering flavour....and the little cake is 'just enough' in terms of sweetness and flavour.  An interesting little loaf which freezes well and requires no icing!  That's a pretty handy recipe to keep in your little recipe box....I'd say!
We are at another weekend again and here's to hoping that it will be as productive as last weekend was!  I did manage to get a little more work done on my little crochet project......Well at least I have not given up and tucked it away....so that's good right??  More on that later...  If you are in need of a little something new to try in the way of baking....Give this mango loaf a try......I think you will like it!

MANGO NUT LOAF
2 cups white flour                     
1 1/4 cups white sugar
1 teaspoon baking soda
1/2 teaspoon salt
1 teaspoon ground cinnamon
3 eggs beaten frothy                     
1/2 cup vegetable oil
1 teaspoon vanilla extract
1/3 c. reserved liquid juice from canned mango
1  (15 ounce) can mangoes, drained and chopped in chunks (reserve the drained liquid)
12 dates, Chopped and simmered for a few minutes in water then drained
1/2 cup chopped walnuts

In a large bowl combine flour, sugar, soda, salt and cinnamon. Beat eggs with whisk till thick and frothy. Add oil, vanilla, mango juice. Stir into flour mixture. Stir till just moistened. Fold in mangoes, chopped dates, chopped walnuts into batter just to incorporate.
Spray two 5 x 7 bread tins with pam. Line parchment paper in each tin. Spoon batter equally into both tins. Bake 350 degrees 50 minutes (in my oven)

** the top will split slightly when loaves are done.
** cut parchment paper so you have two handles on each side of loaf tin to pull loaves out of tins when removed from oven.
** loaves are done when you press on top and it feels firm and the loaves spring back.

Wednesday, February 15, 2012

Thrift Shopping

After a little bit of time in the thrift shops....I came home with this.  Now I just need some free time to work on some crafting projects.  I already started working with the crochet thread on a new project.  It has been on my list of things I'd like to make....hopefully it will see its way to being finished.  So far I have been able to follow the charted instructions without too much trouble.
As it becomes larger, the number of stitches in each round increases, and it becomes slower and slower going.  I also had to repeat two rounds when I discovered a mistake and had to rip it back.  Fortunately, with only one live stitch, it is much easier to rip back crochet than knitting.....and all it cost me was a little bit more of my time.  This is such a cute project.....I hope I can see my way to the end without problem.  Fingers crossed.

Monday, February 13, 2012

Happy Valentine's from Ike

Wow...what a productive weekend it has been.  There has been a lot of preparation for Valentine's Day and little projects going on around the house.  Shortly I will be off to pick up photos for Ike's class Valentines.  I printed one off at home for a trial run, but needed to adjust the cropping a little wee bit so that the printing is not falling off the bottom.  Still...you get the idea.  Pretty darned cute for a last minute Valentine.  It worked well for me as Ike's class is still exchanging Valentine's and most of the store bought options were really better suited to younger kids.  I found this idea on line last year but had already committed to a different idea.  Tonight Ike will be writing on all the backs of the Valentine's......

Monday, February 6, 2012

Valentine Crochet

Brrrrr.....there is a bit of a chill in the air, and I'm just trying to knock it off with a cup of hot Chocolate Ovaltine.  That's better....... although I might just need a little time in front of the fire place too.  I've been up to little crochet lately.  I do much less crochet than knitting.....which is not saying a lot since I don't actually do a LOT of either.  Well, let's just say that I am less competent at crochet....and that really is quite sad.  I've been slowly working my way towards working with crochet thread.   I've made quite a few things with size 3 thread, which really isn't 'thread' in my books, and have just successfully completed my first project using size 10 crochet cotton.  Yeah!  My first project using a steel crochet hook....size 7:)  The projects above are made with size 3 thread, are nice and quick, and are a nice little Valentine's Day gift.  The pattern is available for free here if you feel like making a few.  I ended up making 6 of these (Heart's Desire Doily) for the girls across the street.....a pair for each.  With the last one.....my seventh, I ran out of pink thread and finished it off with red.......I think it turned out OK too....but it sadly has no partner to match:( 
Now this is my size 10 thread project.  I made it in Valentine's colours since I have been involved in some Valentine's craft swaps which it may yet go into.  I have a love for vintage thread crochet pot holders and this (Round Pot Holder) pattern from Purple Kitty Yarns looked like an easy pattern to start with.  It is a double sided 8 inch round project, and it really was quite easy.  You pretty much have the pattern memorized by the third round on the first side.  I made it without a hanging loop as I never use them.....but one could be easily added.  I used only two colours rather that the three suggested by the pattern since I could not decide on a third colour and I wanted to use Valentine's colours.  The finer thread is slower going as there are a lot more stitches required to make the project than if were made with thicker thread.....But I'm pretty happy that I made my way through.......Next I'm thinking about a doily.  It will be a bit of a challenge to find a pattern that I like as I am most definitely not a doily person....I just want to see if I can make one.  Sadly most of the patterns that I've liked have been rated as challenging......perhaps not the best choice for my first one:)

Monday, January 30, 2012

Ice Fishing

This past weekend Ike's Scouting group had a family ice fishing trip planned....and it was loads of fun.  We were fortunate to enjoy good weather (slightly above freezing), good company, and good food.  The ice was a several feet thick, but the group leaders arrived an hour early and made quick work of the holes with a gas powered auger.  Fun times with friends, roasting hotdogs and marshmallows, and catching fish....all good things!  We almost had one, but it was the one that got away as it took the hook and the worm.  Surely it must have been huge!  I spent a lot of time trying to decide what to bring along for food to share and in the end just made a double batch of chocolate chip cookies.  You really cannot go wrong with those.
The kids each had their own hole to fish, and the people next to us caught two rainbow trout.  Ike's attention span for jigging was a little short, so much of the time his hook sat fairly still.  Still, it was nice to get outside with friends and do something a little different.  I hope your weekend was fun too!

Thursday, January 26, 2012

Root Beer Cookies

I had specifically went in search of root beer extract quite some time ago.  I cannot even remember how long ago this was on my mind.  I had found recipes for root beer cup cakes, and cookies that had intrigued me.  Well, one day I found myself in the brew your own beer store and I spied the small bottles of root beer extract and decided that owning one would put me one step closer to trying one of these intriguing recipes. With Christmas approaching I found myself packing up a package for friends in New Zealand and having extra weight allowance in the package I decided to tuck my bottle of extract inside.  With Canada post you pay a flat rate for small package air service for any package between 1 and 2 kg.  So if you know me.....you will not be surprised to know that I stuffed that package to within 2 grams of 2 kilograms.  The lady running the postal outlet found this to be quite annoying.  But I'll be darned if I'm not going to get as much in as I can if I am paying for it! 

It is my understanding that root beer is not common in New Zealand....so now they have the option of following the instructions on the label to make themselves 17 L of homemade root beer.....or to try some root beer baking recipes.......Tough call based on the yumminess of these cookies......and the delicious sound of a homemade batch of root beer.  I think I might have to try that as well:)  While I have seen root beer extract in the grocery stores in the US, in  Canada it is less common and you will likely have to seek it out  in the you brew beer and wine stores.  I think most  you brew stores carry it.  

If you'd like to give the root beer cookies a try, have a look at the recipe over at Makes and Takes.  This is the recipe that I used and I found that I needed all of the water listed to make the dough 'sticky' as shown.  I also used golden brown sugar rather than dark (since that is what I had) and it did make the cookies a little lighter in colour......but delicious none the less.

Tuesday, January 24, 2012

Finished Object and a Pavlova

Clearly I love this pattern. This is the third one of these hats I've made now.  The pattern is getting easier, and this one....as well as the second one...was made with beautiful yarn.  This time it's Manos of Uruguay Maxim in the colourway 'fire'.  Perfectly soft and with subtle changes in the colour tone to give it a little more depth.  Made for no one in particular, I will have to set it aside until I find someone to make use of it.
My family seems to have recovered from a bout of Norwalk virus that has been making its way around and brought all to a halt last week.  Finally, many days later, I felt like I could do some cooking again and we had a proper dinner and a Pavlova which my DH had been asking and asking and asking for.  It turned out thoroughly yummy and I could have turned right around and started making another.  But then, there are the left over yolks now.........I just need to figure out what to do with them.....hmmm any ideas???  I've read sponge for trifle as a suggestion and may give that a try??  Left over yolks aside......the trifle was delicious and had the most marshmallowy soft interior......
YUM:)  I'll definitley be making one again.....and next time I think I'll try banana split toppings.  If you'd like to try your hand at a Pavlova try this recipe.....It's very basic and super easy!!

Saturday, January 14, 2012

OMG Fudgy Brownies

So......it has been a busy job of getting back to business after the Christmas holiday.  There has been as always...lots to do and lots of things on the go.  I will confess, that my Christmas tree is still up...hoping to get to that today.  Yesterday, after coming home at the end of a 'too busy' week.....I walked into the house and collapsed on the couch to grab a moment of rest.  Fortunately there were left overs for everyone to eat so I did not have to make dinner....just as well as I was beat.  Sadly I only managed to rest for maybe an hour before the 24 hour flu my son seemed to be suffering from kicked into high gear.  Poor little guy.  This morning he seems to have turned it around and it looks as though he will be able to keep down some food.  
I grabbed a nice cup of tea and some toast this morning only to notice that the pan of brownies I made the other day was down to its' last slice.  So I grabbed a picture of it because once everyone is up and about....it won't stand a chance.  I was looking for something to bring to the PAC meeting at the school two days ago and decided to try this recipe.  Unfortunately, they did not cool quickly enough for me to take them to the meeting.....so we had to eat them.  Well, they turned out fabulously and I will most definitely make them again.  I did make a slight substitution as they called for Port Soaked dried Cherries.....which I am sure would be fabulous......but I just happened to have a jar of vodka soaked cranberries sitting on my counter that needed to be used up.  I had used the other half of the jar in a pound cake recipe some time ago.....now I finally finished the jar.  They were delicious and as rich and fudgy as the recipe claimed it would be......and there was only cocoa powder in the recipe.....so no need for melted chocolate.  Some times, this is an issue for me, and it is nice to know that I have a nice fudgy brownie recipe to turn to in my hour of need when there is no chocolate to be found.  I was too lazy to try the delicious looking recipe for the ganache icing provided in the recipe....but let me assure you....this recipe is delicious enough to disappear in a day without the frosting....it really doesn't need it!!!  Whether you include the booze soaked fruit or opt to add nuts or nothing at all....this is a great browning recipe to keep on hand for those times when you don't have any chocolate kicking around to make brownies.  These were so very good and easy...I hope you'll give them a try.  Just be sure to remove them from the oven before over baking them.  As an added note...in addition to the cherry substitution I mentioned above......I was also out of butter so I used margarine.....and I only had Dutch processed cocoa...which I used rather than the natural cocoa called for....and it still turned out fabulously:)
Rich and Fudgy Brownies
1 cup unsalted butter, and more to grease the pan
2/3 cup flour, more to flour the pan
2 cups granulated sugar
4 large eggs, at room temperature
1/2 tsp vanilla
3/4 cup unsweetened natural cocoa powder
1/2 tsp baking powder
1/2 tsp salt
Port soaked Cherries (optional see recipe below)
Port Ganache Topping (optional see recipe below)
Position rack in center of oven and preheat oven to 350F.  Butter and flour a nine inch square pan (I would recommend lining with parchment if you have it).
Melt the butter in a large saucepan over medium heat.  Remove from the heat and whisk in the sugar, followed by the eggs and vanilla.  Stir in the flour, cocoa, and baking powder slowly so as not to have it come flying out of the pan.  Stir more quickly as it become incorporated.  Stir until uniform...this should only take about a minute.  Add in the Port soaked cherries at this time if you are adding them....along with any liquid from the pan.  Spread the batter into the prepared pan and smooth evenly.  Bake until a toothpick inserted 3/4 inch deep into the center of the pan comes out with just a few moist clumps clinging to it.  This will be about 40 minutes.  ( I start testing after 30 minutes and wait until there is no wet batter clinging to the toothpick)  Remove pan and set on rack to cool completely.  If topping with the ganache, spread it evenly over the cooled brownies and let sit 1 hour before slicing.  The topping will still be quite gooey.  Keep covered at room temp for 3 days or freeze for up to 1 month.
Port Soaked Cherries
1/2 cup dried cherries, coarsely chopped (or whole dried cranberries)
1/2 cup tawny port
In a small sauce pan bring the cherries and port to a boil over medium heat.  Reduce the heat to low and cool for 2 minutes.  Take the pan off the heat and let cool to room temperature.
Port-Ganache Topping
1/2 cup tawny port
1/2 cup heavy cream
6 oz semisweet chocolate, finely chopped (about 1 cup)
In a small sauce pan over medium heat, bring the port to a boil.  Boil until the port is reduced to 2 Tbsp. This should take 3 to 6 minutes.  Pour it into a small cup or bowl.  Rinse the pan well and bring heavy cream to a boil over medium high heat, stirring occasionally.  Remove pan from the heat.  Stir in chopped chocolate and reduced port until the mixture is smooth and the chocolate melted.  Pour into a bowl and cover the surface with plastic wrap to prevent a skin from forming.  Put the bowl ina cool area stirring occasionally.  When cooled spread over the cooled brownies, and let set up one hour before slicing.