Thursday, December 29, 2011

Mrs C's Garlic Toast Spread

Hopefully everyone had a nice relaxing Christmas!  We sure did here.  This is only the second time that we have elected to stay home for the holidays in may years.  We spent a nice Christmas Eve over visiting with neighbours, and had our own quiet Christmas at home...just the three of us.  I managed to find quite a small turkey......small enough for one turkey dinner....plenty of toasted turkey sandwiches....turkey soup.....turkey pot pie....and even a smidge left over yet.  Today I made the soup and pie to use up the bulk of the meat (and my 4th batch of ginger sparkles this holiday....don't know where they all keep disappearing to??).  Along with the soup....while there was not enough time to make buns by the time I thought about it....I did run to the store to grab some nice fresh Scotch Baps to turn into garlic toast.  This garlic spread is from a family friend (Mrs C) who has since passed away.  Many times during the year I find myself pulling out my notebook and making one or another of her recipes.....she was always such a good cook, and a good person.  
Mrs C's Garlic Toast Spread
4 oz softened cream cheese
2 oz softened butter
1/2 tsp dry mustard
3-4 shakes of garlic powder
1 tsp sour cream
pinch of pepper and salt

Mix all together and spread on split buns.  Toast in oven until topping begins to turn golden.

Friday, December 23, 2011

It's Never too Late for Candy

Last day of work today before the holidays begin:)  And I tried a new candy for this holiday season for Apple Cider Caramels.  They did not disappoint!  They were pretty straight forward to make and are really quite delicious.  I came across the recipe (over at Our Best Bites) while looking for ways to use up the abundance of apples that I had been gifted with. With only a day or two before Christmas there is still time to try out a batch of these caramels....you may even have all the ingredients waiting in your kitchen??  I'm about to make my second batch today....
Cider Apple Caramels
2 cups apple cider (or good quality apple juice)
1 cup whipping cream, divided
1 1/4 tsp cinnamon
pinch of nutmeg
1/4 tsp allspice
1 1/2 cups sugar
1/3 cup corn or cane syrup
1/2 cup butter, cut into cubes
Simmer 2 cups of apple cider on the stove until the volume is reduced to 1/3 cup.  I measured periodically with glass measuring cup. Set aside to cool.
Line a 8 inch square pan with parchment and grease very lighlty to prevent sticking. Set aside.
In a bowl, combine 2/3 cup of the cream, 1 1/4  tsp cinnamon, a pinch of nutmeg, 1/4 tsp allspice and reduced apple cider. Set aside.
In a heavy saucepan, combine 1 1/2 cups sugar 1/3 cup syrup and cook over low heat to dissolve the sugar, simmer at medium heat until it reaches 234 F.  Remove from heat.
Slowly whisk in cream mixture and 1/2 cup cubed butter stirring until incorporated.
Return to heat and cook to 248F.
Remove and pour immediately into the prepared pan.
Cool completely and cut into 1/2 inch wide logs.  Slice each log into the desired size and wrap in waxed paper.  Keep in a air tight container for up to 2 weeks.

Wednesday, December 21, 2011

Retro Marshmallow Roll

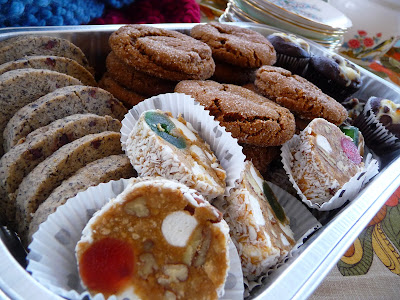
Only a few more days left until Christmas......I can hardly wait for the break.  Although work has been a little less busy due to the fact that most of my customers are winding down and taking holidays now....my spare time has been filled with baking and knitting.  I just finished making my third batch of Ginger Sparkles, a batch of Buckwheat Cocoa Nib Shortbread cookies and also a batch of chocolate cheesecake cupcakes. (All of these I highly recommend as some of my favourites!!)  Last night to add some variety to the baking assortment, I made a marshmallow roll that my mom and grandmother used to make each and every Christmas.  It is unbaked and all is held together with a can of sweetened condensed milk.  I really loved this slice as a kid and it tastes exactly like I remember it.  The original recipe was printed on the back of the Eagle brand sweetened condensed milk label back in the 1940's. (The original recipe called for dates rather than festive cherries....but I like the colour that the cherries bring.)  I was prompted to make it after finding recipes online for Lolly Slice which is very much along the same lines with only very minor differences.  So if you've made Lolly Slice and like that sort of thing......you may like this as well.  Go ahead and try it....it'll take you 10 minutes:)  Feel free to make a 1/2 a batch if it seems like too much....that's what I did....but I think I'll be making the other half quite soon.
Marshmallow Roll
1 tin sweetened condensed milk
1/4 cup water
400g package of graham wafer crumbs (malt biscuits would be a very close substitute)
400g package of mini marshmallows
1 cup chopped walnuts or pecans
1 1/2 cups glaced cherries red or green or both
1/2 cup dessicated coconut (optional)
Mix all except the coconut in a mixing bowl until well mixed.  (The original recipe calls for 1/4 cup of water to be added in with the milk, but my mother has never made it that way, so I add the water as I am mixing if it needs it.....and this time I did add about 1/4 cup)  Mix with your hands, wetting your hands frequently to stop it from sticking too much to them.   Divide the mixture into five equal amounts and shape into rolls or logs about 2 1/2 inches in diameter.  I then rolled mine in the coconut because I think it looks prettier, and wrap in wax paper.  Keep in the fridge for several hour so that they firm up.  Unwrap and slice in 1/4 inch slices as you need them.

Tuesday, December 13, 2011

Need to Make Last Minute Gifts??

Christmas is approaching fast.  It is hard to believe that November is over.  Where did it go in such a hurry???  When December hits......the panic to finish my Christmas shopping always sets in.  If you are like me and like to make at least some of your Christmas presents.....................have a look at this list of links to handmade gift giving ideas.  There is still time!  Most of the things listed below are pretty darned quick....although if I'm in a pinch....not much is quicker than candy.  Above are the cookies for my son's teacher who has her last day this morning......A bit of information my son was kind enough to share with me last night before bed.  Baking is fast.....and when it comes to teachers gifts......a reliable source tells me.....with so many students each year bringing small gifts......consumables are most appreciated. Oh and if you are in Canada....take a minute to stop over at Merry with Children and check out her blog......and her Presidents Choice Gift Card Giveaway.  Thanks for stopping by:)

Knitted Gifts

Sewing Gifts
Crafty Gifts
     -These are all great gifts for teachers, neighbours, or thoughtful hostess gifts.
Gifts from the Kitchen
Favourite Handmade Gifts from Etsy

      Monday, December 5, 2011

      Porcelain Graffiti

      With Christmas coming up, I've been on the lookout for gifting ideas.....and I wanted to give porcelain painting a little try.  While I was in the thrift shops......I picked up a few things to play with.  I figured that the plain white diner mugs at 50 cents a piece were an inexpensive way to give this porcelain painting a try.  Worst case......I've only wasted a dollar.  And quite honestly, I would have a difficult time painting up china of any real value.  I washed them up...good as new... and wiped down the painting area with rubbing alcohol to remove any grease that might stop the paint from sticking.
      And then..............
      • I went to my computer and printed out some words in a font I liked in a size appropriate for the mugs......
      • Then I cut out the words with a 1/2 inch border around then.....
      • scribbled soft lead pencil over the back side of the lettering and taped the wording where I wanted it centered on each mug......
      • And finally traced around each letter with a ball point pen to transfer the pencil lead onto the mugs.  
      • Then, I painted in the lettering with ceramic paint. (I used Deco Art Americana Gloss Enamels) although my preference would have been Pebeo 150....but it is more difficult for me to get.
      • After letting the painted item sit for 48 hours.... it needs to be placed into a cool oven...let the oven heat with the item in it to 325F and bake for 30 minutes, then turn off the heat and let the item cool in the oven.
      Soon we shall see how well the paint adheres to the mug.....and I'll let yo know. Coming up with things to write....seems to be the most challenging part.  Let me know if you have any good ideas.  If you'd like to purchase ready painted china go and have a look at Vandalized Vintage on Etsy...Be warned, that her brand of humor will most certainly be offensive to some, as many of her personalizations are rude, but are meant to be humorous. Keep in mind that porcelain paints should only be used on surfaces not meant to come in contact with food.