Showing posts with label Kid Stuff. Show all posts

Thursday, June 28, 2012

An Amazing Kids Party

I'm not sure how my son decided that this year he wanted to have an Amazing Race Party for his birthday.  We don't really watch the show....but I understand the general idea.  My friend Alison had and talked about an Amazing Race party for her son Andrew several years ago now....so I did have some ideas on where to start.
Although I really tried to start the preparations far in advance, there always seems to be so much left to the last minute.  I found a great site that had printable clue sheets that you could put your own information into and that proved to be most helpful.  The biggest challenge for me was to come up with challenges that did not require someone to witness them.  In total we came up with 14 challenges which took the teams about 1 1/2 hours to complete.   I learned a lot, and would change a few things if I were to do it again, as some challenges which I thought would be quite straight forward were difficult and others were just the opposite.  I had hoped to use the YUDU screen printing machine to make special team t shirts for the kids to keep, but due to my typical last minute panic attack decided to  just use plain coloured t shirts.  By far the most entertaining challenge was the baby food challenge where the teams had to pick a member to eat a randomly selected jar of baby food ranging from strawberry dessert, to spaghetti, vegetables and meatballs.  
It appears that all flavours were texturally offensive, and the team that got the strained pears......could not finish......while the team with the pureed spaghetti managed to pull it off.  Our entire weekend was under a severe thunderstorm warning, but we lucked out with beautiful hot weather with no rain.  I had super cheap Canadian flag back packs which gave a spot for the teams to keep their clue sheets, pens and snacks while they raced.....I even found some dollar store rain ponchos....just in case.
I'm pretty sure the kids all enjoyed the party.....even though one team got stumped for over 45 minutes not being able to find the 'travelocity gnome'......in a little green space in the neighbourhood. 
We ended with lunch and cake, and a 'fill your own goodie bag' with selection of toys and candy.

 If anyone is wanting to host their own party and is interested in the clues we used, just let me know and I can list them here.
Update....here are some of the challenges we used:
Events for the race were:1)  choose 1 team member to eat a jar of randomly chosen babyfood....there was a 50% split between dinner choices, and dessert choices  2) Choose 1 team member to eat  cookies from a tray until they find one with a gnome game piece hiding under it....we had a 24 muffin pan filled with dollar store 'oreos' with 3 of them hiding a gnome picture underneath  3) Assemble a 30 piece puzzle, flip it over to answer the question written on the back ....question was "what is the colour of the house at 1234 Carlisle Way"  4)   Challenge ...team takes turns shooting hoops until they shoot 6 baskets.....or taking turns, roll the die until they roll 12 sixes.  5) With a riddle to lead them to the school yard....count the number of wooden butterflies on the fence, write down the school address, and count the number of swings at the school.  6) Find examples of six different kinds of trees 7)  Collect and return 50 dandelion flowers 8)  With a clue to lead them to the school garden...dig up and return with buried treasure...we had buried 20 gold toy coins in ziploc baggies in the kindergarten digging bed at the school.  9)  With a riddle to lead them to a neighbourhood green space....find the name of the gnome hiding in the woods...we had written Norman on the bottom of the gnome.  10)  Match the pictures of the Provincial flags with the names of the Provinces.....time was added to their score for each wrong answer.  11) A page of three riddles with time added for each wrong answer  12)  Count the number bricks in the garden wall.  13)  Count the number of spindles in the back deck.

Wednesday, March 23, 2011

Smore Pancakes

Ike came back from his cub scout winter camp out, talking endlessly about the smores pancakes they had for breakfast.  After promising for the last week to make them.....tonight he got lucky.  While we were having left overs........Ike got his smores pancakes.  There is not much to them really.  Just make pancakes and sandwich between two of them..... mini marshmallows, milk chocolate chips, and crushed graham wafers.  I found them to be quite sweet.....but Ike declared that they were just right!
It is best to assemble them quickly and to use pancakes hot from the griddle.  After setting 2 minutes......the chocolate chips were melted and the marshmallows were gooey.  Enjoy with a large glass of milk:)

Monday, November 1, 2010

A Happy Hogwarts Halloween

Ever since Ike as been old enough.....I  have encouraged him to choose his Halloween costume, and I do my best to make something fitting his description and also something warm enough for the weather.  This year we were fortunate to have an absolutely beautiful Halloween night.  This worked out well for me since this is the first Halloween costume I've made for him that is not made out of polar fleece. 
Ike decided that he wanted to be a wizard for Halloween and I must admit that it took me a little while to clue in as to what he might think a wizard costume might look like compared with what I might come up with.  After a week of mulling over ideas in my head....it dawned on me that Ike's only 'experience' with wizards would be the Harry Potter movies.  Good thing I asked......because what he really wanted was a Hogwarts Student costume.  Vastly different than the shiny blue Merlin concoction that was brewing in my imagination.
This costume was really a fun one to make and is the first costume that I have bothered to buy a pattern to start with.  I purchased the McCalls 5952 pattern and found it to be extremely simple, a nice first time pattern with only 4 pieces. I modified it only slightly, taking 10 inches off the depth of the sleeve at the wrist, also making the back of the hood more 'pointy' and adding a wand pocket on the inside left side. I lined the hood with a wine coloured fabric similar to the Gryffindor colours from the later movies and ordered a Hogwarts crest from Ebay.  I found instructions here on making a Chinese Button Frog closure  to close the front of the robe.  I planned to remove the ties at the neck, but Ike decided he wanted to keep them as well.  Thinking ahead to next year, I made the robe a little on the long side.  The rest of the costume came together from thrift store finds and from our closet.  A mans medium grey V necked camel hair sweater to felt down to size, a boys white dress shirt, a tie of burgundy  and gold, and black pants finished off the outfit.  Two hot wash cycles with a few pairs of jeans, followed by a trip through the dryer made the mans medium camel hair sweater a little warmer and........just the right size!
Time permitting I decided to think about a Gryffindor scarf and DH thought about the wand.  The scarf took a bit of time fussing with the knitting machine to produce it and DH did the most marvelous job on the wand.  I think the whole wand construction took only 1/2 hour and cost $5 in parts, with parts to spare to make another.  It is constructed with an eleven inch section of oak dowel, a wooden handle for a pail, and a wooden ball.  DH drilled out the center hole of the pail handle and wooden ball using the drill press, to match the diameter of the dowel.  The dowel runs through the pail handle and into the wooden ball and is all glued together.  He also tapered the dowel slightly with sand paper on his drill press.  He then stained the working end of the wand and shellacked the handle end, lastly covering all in four coats of spray varnish.  I think Ike is likely to get a lot of use out of this one:)  After printing out the list of Harry Potter Spells from the internet......there was a lot of practicing!
We had a perfectly great Halloween here even though DH missed out as he had a course to attend out of town:(  Grampa, who is visiting, helped out lots with Ike's pumpkin carving and with the knitting machine too!

Thursday, September 23, 2010

Who Likes Cub Scouts??

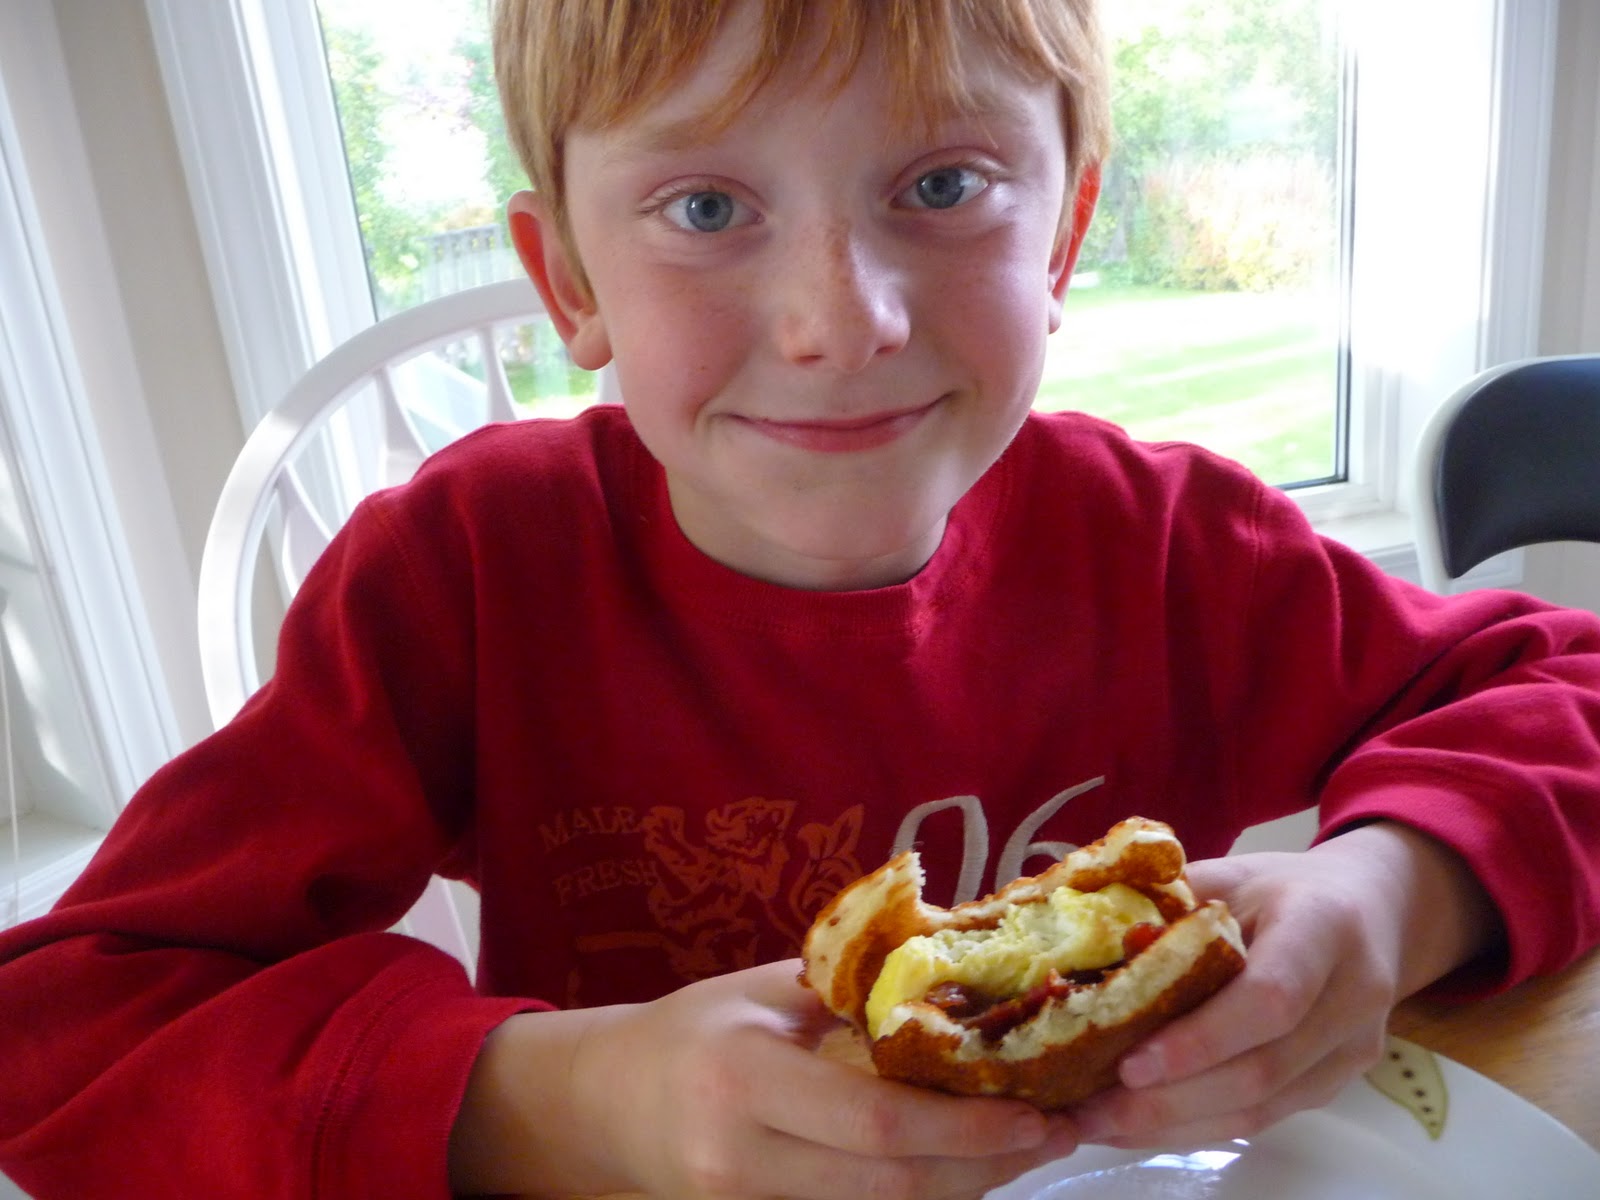
Someone here has just joined cub scouts......and is totally stoked on it.  It has only been 2 weeks into it and there has already been an over night camp out in a historical fort a few hours drive away.  Fort St James is a small fur trading fort that is run by Parks Canada and is a common stop for school tour groups.  I was away unfortunately or I would have tagged along.......but I hear it was just awesome fun!  Well now the race is on to collect cub scout badges.....and while there are a few that I can help him with.....we decided to work on the most obvious today.  So Ike made supper tonight.  DH is away golfing so it was the perfect night for a pancake supper with all the fixings.....and all from scratch...way to go Ike!  Ike even decided to make his own version of the McDonalds Pancake and egg sandwich......and according to Ike.....it's pretty darned good:)

Friday, June 25, 2010

ARRGHH It's a Pirate Party!

Wow.....how much work could a children's birthday party be anyway???  After 4 years of getting off easy by having Ike's party at the waterslide (it just doesn't get much easier than that)......it was time for another at home birthday party.  Thank goodness the rain stopped long enough for all the outdoor activities!  All said and done I think (I hope) that the kids had lots of fun! 
Ike got it into his head that he wanted to have a treasure hunt at his party, which prompted him to think that a pirate party would be an appropriate theme.  So after a bit of thought we decided that the 'treasure' at the end of the hunt would have to be a treasure chest filled with good pirating booty.  I fashioned a rather quick treasure chest out of a hinged top shoe box and filled it with chocolate coins, ring pops, candy necklaces, mardi gras beads, play tiaras, gem stone rings,  tootsie pops and little butter finger bars. 
First the kids searched the front yard for 'gold nuggets' (spray painted landscaping rocks) with which to buy their foam pirate sword and eye patch. Then the treasure hunt started.
The kids found 10 hidden clues.....each leading to the next until they found the map which revealed the location of the chest.  It worked out quite well and more organized than I'd imagined as they took turns in a circle choosing an item from the chest to put in their 'booty bags' to take home....until the chest was empty. 
Then we played pass the present, crush the canon ball, and a few games of hot potato.  After pizza, cake and ice cream.....the swords created all kinds of entertainment.  As a word of caution....ten 9 years old kids with swords do need a bit of supervision:)  We'll see if we all feel up to this next year.  The party started at 2:45pm (right after school) and the last two guests departed at nearly 8pm.  I think they had a good time!

Saturday, May 15, 2010

A Kefir Dip or Spread Would be Good?

As my Kefir grains multiply, I am able to make more kefir than can be consumed by smoothies alone.  Plus.....I don't want to make everyone bored with the Kefir and fruit smoothies...now do I.  From the heaping tablespoon of Kefir grains I started with.......I now have a good 1/3 cup.  I still use a 1 L (1 quart) canning jar to make the Kefir, but now instead of making 1/2 a jar each day I can make a full jar. With left over Kefir sitting in the fridge, and the next batch already ready to strain.....I decided to try and  see if I could make a Kefir product that would be about the  same consistency as spreadable cream cheese.  I took my strained Kefir milk from the fridge and poured it into a strainer lined with a large paper coffee filter and left it to sit over a deep bowl to drain (with a cloth cover so nothing would settle into it).  After only about two hours, it was a similar thickness to sour cream.  I left it even longer ...............and after about 8-10 hours, it was about the consistency of spreadable cream cheese.  (I say 8-10 hours as I left that batch over night and I'm not sure of the timing)  The roughly 2 1/2 cups of thin Kefir milk had been separated into almost 1 cup of "cream cheese" and about 1 1/2 cups of whey.  You can play with the times to get the consistency you'd like, and keep in mind that refrigeration will thicken it up a bit too.  Also the type of milk you Kefir will have some affect of the thickeness of your product.  Skim milk Kefir will be thinner than whole milk Kefir, so it will produce more whey and less 'cheese' when filtered.  (We drink skim milk here, so I always keep a small container of full cream in the fridge to 'make my own whole milk' for Kefiring.  You could easily thicken the Kefir to sour cream thickness and use it as a sour cream substitute.  The flavour is tart and bright some where between that of sour cream and plain yogurt.  I chose to add 2 rounded teaspoons off dill dip mix to my 1 cup of cream cheese to make a flavoured cream cheese spread.  My son has been tearing through herb and garlic spreadable Philadelphia cream cheese at an alarming and expensive rate, so if this product passes the Ike test.....it could be a nice alternative. Again you can vary the amount of dip mix to flavour your dip or spread.  When I added 1 rounded teaspoon the tart yogurt flavour still shines though....but with 2 teaspoons added, it pretty much tastes like a store bought flavoured cream cheese as the spices over power the bite of the yogurt.  And of course you will want to let your  dip or spread sit for at least 30 minutes to develop the flavours. There are also some interesting uses for the Kefir whey so it need not be wasted...more on that later:)
My parting thoughts of this.......This is really another great way to use up Kefired milk.  I found the flavour of the dip and spread produced to be delicious.  (The neighbours liked it too....so it's not just me) If you'd like to see some dip mix recipes, look through this post....if you don't happen to have any dip mix on hand.

Saturday, April 17, 2010

Ike's Little Brewery Experiment- Product Sampling

Well, I'm happy to report for those of you who might be interested, that the Gingerbeer experiment was indeed a success!  It passed Ike's quality control inspections for appearance, taste and fizzyness.  The flavour of it has a mild ginger bite and it is not super sweet........just sweet enough in fact.  And as the recipe promised....it delivers a lot of fizz!  I was actually a little surprised that Ike liked it as it does have a very slight smell from the yeast no doubt.......that smells like spilled beer after a night  of partying.  Good to know that this odor is not offensive to Ike......he should have no problem with University then!  We've passed a dozen on to a few neighbours now and will await further feedback from some impartial victims taste panelists.  I think it will be quite a refreshing drink ice cold with a slice of lemon or lime on a hot summer day......don't you think???  It was a very fun little project for Ike and I'm sure we'll try it again:)  The amount of head space to leave in the bottles was a bit of a mystery.  From what we've experienced to date....the bottle on the left will probably fizz over a bit when opened.....and the other two will probably be  just right.  Now....I open them all very slowly.....and over the sink just in case:)  Ike has been telling his friends that we squeezed our cat (Ginger) to get the juice to make this with........(really we didn't...... that's just a joke!)  I wonder if I should make up some labels with her picture on it???  What a super easy and delicious project for kids to make!  Wanna make some too????  Look here for the instructions....you really should!

Saturday, March 20, 2010

Ike's Little Brewery Experiment- Day One

The Gingerbeer Factory
Before spring break started, I had noticed a recipe over at Meet me at Mike's for making homemade gingerbeer.  I thought that it might make a nice and easy little experiment for Ike to do over the holiday.  Since we made our impromptu trip to Victoria that little experiment was put on hold.  Well this morning we remembered and we started our little brewery to make some of Ike's Hard Gingerbeer.  I think the actual alcohol content will be extremely negligible(enough so that kids can drink it too) but we can measure that in a few weeks when it's ready.  The whole process takes 3 weeks from start to finish, and we (well I am anyway) are excited to see the end result.  If we at all like the taste of the finished product, I did find another recipe  that I am also curious to try using fresh ginger.  Then we will have a basis for comparison.  All you need is a 1L (4 cup) container (mine is much bigger since it is what was handy for me), powdered ginger about (1/2 cup), sugar, yeast, and water.  Have a look at the recipe over at Meet me at Mike's if you'd like to try it as well.  If you'd like to try a version using lemon and fresh ginger, have a look at this one.  Very little is required for effort each day so it's just a perfect project for Ike to look after.

Thursday, February 18, 2010

Sugar Cookies and Cupcake Walks

It's been a bit of a baking fury here over the last week. We had the Valentine's cupcake walk which saw volunteer parents bring in over 400 cupcakes to the school for the kids to play for. I had fun whipping up some quick and hopefully cute cupcakes to donate to the walk. I had some white cake mix that needed to be used up and jazzed it up a bit by adding 1 tbsp of coloured sprinkles into the batter. (Well..... I thought it looked more fun that way) I substituted half of the cream in my basic butter cream recipe for 1/4 cup raspberry jam and a few drops of red food colouring to add a little more flavour. (If you use conversation heart to top your cupcakes.....put them on just before you need them because they will absorb moisture from the icing)
It was the usual cake walk rules where you walk around the numbered spots of the circle to music and stop on the nearest number when the music stops and several winning numbers are pulled. This year we changed it up a bit by letting those whose numbers were not pulled to remain in the circle to play again and again, only filling the spots of the winners who had left the circle. Two years running the DH has insisted on creating a music track for the cupcake walk, starting with the 'Cuppy Cake Song' and including all the newest and hottest music.....all edited for bad language. He is the ultimate Cupcake walk DJ, and the kids seem to like his choices. He is really in tough with 5-10 year old music scene:) Through the lunch break we managed to put through 300 players all happy to claim their cupcake prize at the end. The money raised went back to the school to help purchase food supplies that are kept on hand for children who have not brought enough to eat on any given day. We are very lucky to have a very supportive parent community at our school. I had thought about putting a sugar cookie heart into the top of each cupcake rather that the conversation heart I ended up using........but the cookie dough sat ready and waiting in the fridge after I decided to not make this a more time consuming endeavour than it needed to be.
After the walk was over, I still had this batch of dough that needed dealing with so I did eventually bake them up. Plus it was a good opportunity to use some new cookie cutters I picked up on my last trip through IKEA. I must say...they are pretty darned adorable...there's a moose, fox, bear, hedgehog, snail, and a sweet little squirrel that I'm nuts about! I'm pretty pleased with this inexpensive purchase. It will be well used I'm sure. I absolutely love this sugar cookie recipe too. It is one that come on a package of cheap dollar store Easter cutters many years ago, and have yet to taste a better one.......dollar store....go figure! It's easy, dependable and delicious if I do say so myself. I have made this recipe for years usually changing the icing flavour to match the colour. For Halloween it is usually anise black bats and black cats, vanilla ghosts, orange pumpkins etc. Christmas is the only time I don't use this sugar cookie.......as at that time I always make Egg Nog flavoured Sugar Cookies from a recipe that my good friend Jeannie gave me some time ago. (Also a really good one) This sugar cookie recipe also keeps extremely well and the cookies are kept somewhat soft by the icing. They will keep very well for a week in a tightly sealed tin.........if you can stop eating them that is... Go on...make some they are really good!
Sugar Cookie Recipe (Right off the Dollar Store Package of Easter Cutters)

1 cup butter
1 cup sugar
1 egg
1 tsp baking soda
2 tbsp orange juice (although I used mango this time and I think I liked it better)
1 tsp almond extract (this time I used orange extract since they were coming to school)
2 1/2 cups flour

Mix first six ingredients with electric mixer until fluffy. Gradually stir in flour until well mixed. (I use the stand mixer because I'm lazy but you can do it by hand) Chill 2 to 3 hours in the refrigerator (it's quite a soft dough) until firm enough to roll out. Preheat oven to 400 F. Roll out half of the dough at a time on a well floured board. (turning and re flouring as needed so it doesn't stick) Roll out to 1/8 to 1/4 inch thick and cut with cutters and transfer to a non stick baking sheet. Scraps re roll very well, just knead in any flour well before re rolling. Always use a nonstick sheet or use parchment or they will stick badly. Bake 6-10 minutes until the edges of the cookies are beginning to get golden. Remove and let sit on cookie sheet 1 minute before transferring cookies to wire racks to cool. Once cool decorate with Sugar Glaze Recipe.

Sugar Glaze Recipe for Sugar Cookies
2 cups confectioners sugar
4 tsp light corn syrup
3 tsp milk or cream
1/2 tsp flavouring (use vanilla, almond, orange, lemon or anisette to compliment the flavouring in your cookie or the colouring of the icing)
colouring optional

Mix first 4 ingredients thoroughly and spread onto cooled cookies. It will dry shiny and firm and will help to keep the cookies moist. If you are doing multiple colours separate the icing into separate bowls and colour and flavour the icing appropriately. For Halloween we make orange iced pumpkins, anisette iced bats and black cats, and vanilla ghosts. Cover any icing that you are not using as it will dry out. If it does get to thick....add a few drops of water and stir it up well. This amount should cover 1 batch of sugar cookies. Let icing firm up (maybe an hour) before stacking them in a tin. These keep quite a long time ( a good week for sure) in a tightly sealed tin.

Tuesday, February 16, 2010

Pepperoni Stick Snacks

We had had a snack similar to these at my mother in law's house several times in the past. They were purchased from a local grocery store so I am not sure what the recipe was......but this is my best guess.

I make the dough in my bread machine...because I am lazy.....so they really take no time at all. Once the dough is ready, I let it rise until double in bulk......then punch in it down and divide it into 10 equal pieces. Then I roll each piece between my hands to form a long 'snake' of dough about 2 times the length of the pepperoni stick I want to wrap. This time I purchased a 1.5 kg package of pepperoni sticks that were a bit hotter than Ike would have liked....but he seems to be getting used to them now. Next time I will try and find a less spicy brand or I might try it with the honey garlic flavour. The recipe for the dough is enough to cover 5 long (12 inch long) pepperoni sticks, each cut in half.....so it makes 10 (6 inch) sticks. As each piece of dough is rolled, I then spiral the dough around a pepperoni stick and set it on a parchment lined sheet ready to bake. If you like, you can give each one a sprinkle with some grated cheddar cheese before baking. Bake at 400 F for 10 minutes or until just beginning to turn golden.
They are great for the lunch box, or after school snack. Ike gives them two big thumbs up:)
Pizza Dough for Pepperoni Stick Snacks

1 cup warm water
1 tsp honey
1/2 tsp salt
1 tbsp vegetable oil
2 cups all purpose flour (may substitute up to 1/3 with whole wheat)
2 tsp instant yeast

For the bread machine, place ingredients in the bowl of your bread machine in the order given and turn on dough mode. You can also make this without a bread machine as for any bread recipe.

Sunday, December 27, 2009

Daring Bakers Ginger Bread House

The December 2009 Daring Bakers’ challenge was brought to you by Anna of Very Small Anna and Y of Lemonpi. They chose to challenge Daring Bakers’ everywhere to bake and assemble a gingerbread house from scratch. They chose recipes from Good Housekeeping and from The Great Scandinavian Baking Book as the challenge recipes. To see some beautiful Gingerbread Houses go to the Daring Kitchen Blogroll and check some out!
This month's challenge had to be done on the road as we were away for the Christmas holidays. After reading numerous comments concerning difficulties with the recipes provided I started to worry about a failed attempt. As it turned out, Lee had a recipe and pattern already tucked away from making Gingerbread Houses with her kids when they were younger. I decided immediately that I would use her recipe and pattern rather than taking any chances. I really liked how her pattern had next to no waste. I also liked that the cookie was baked in one piece, and the house pieces were cut out immediately after removing the cookie from the oven. No worries about pieces shrinking in the oven and not fitting properly. Although this recipe is very similar to one of the provided recipes....I liked the scaled back size of the recipe as I was not so interested in using 8 cups of flour. It all worked perfectly....thanks to Lee! I used only the royal icing to glue the building pieces together and could have made a 1/2 batch and it still would have been plenty......and I let Ike do the decorating.......so really this is part Ike's challenge too:) He had a lot of fun!!


Auntie Lee's Gingerbread House

2 3/4 cup sifted flour
1/2 tsp salt
1 tsp ginger
2/3 cup molasses
1/8 tsp cloves
1 egg
3 tsp baking powder
1 tsp cinnamom
1/3 cup brown sugar
1/2 cup oil

Mix thoroughly and chill for several hours (overnight or longer). Roll dough onto an oiled piece of foil to fit the pan. Place on cookie sheet and bake at 300F for 20-30 minutes. Place pattern pieces on hot bread and cut immediately. Lift out carefully and cool on a cake rack. The gingerbread should be very hard when cool (if necessary, the pieces can be laid back on the cookie sheet in the oven for five or ten minutes longer). The roof sections will break off if the dough is not thoroughly baked.


Royal Icing

3 egg whites at room temperature
1 lb (4 cups) icing sugar
1/2 tsp cream of tartar


Beat thoroughly in a mixing bowl until the icing stands in peaks, then keep the bowl covered at all times with a damp cloth, as this icing dries very quickly and becomes very hard.
Decorate with a variety of hard candies.

Wednesday, December 23, 2009

Make Salt Dough Ornaments With the Kids

Earlier this year Ike made a batch of salt dough ornaments to enter into the local fall fair. They turned out to be a perfect addition to the packages of homemade candy and baking mixes that we had prepared for family and friends. This year we made up Ginger Sparkle Cookies, Almond Roca, and Ike's Special Brownie Mix. I found these cute gift bags and the ornaments were perfect to finish them off. The salt dough ornaments are a nice easy craft for the kids to cut out and paint. They make a nice gift for teachers, and family too. Ike brought in one of these bags with a dozen Ginger Sparkles and his favourite ornament to gift to his teacher before Christmas break.

Salt Dough Recipe

2 cups flour
1 cup salt
3/4 cups water

Mix all ingredients and knead to make a pliable dough. If the dough is too sticky...add more flour. If it seems crumbly....add a few more drops or water. Roll dough to desired thickness and place on cookie sheet to bake. I found it helpful to put a layer of parchment under the cut outs. Push a wire loop into the top of the ornament to use for hanging. We took a paper clip and cut it into a U shape 1/2 inch long to make the hanging loop.

Dry in oven at 170F. Allow one hour or drying time per 1/4 inch thickness of dough.

Once cooled, paint and varnish.

Sunday, November 15, 2009

Artist: Ike

Ike was pretty excited this week as he was lucky enough to be one of three children chosen from his class to display a piece of his artwork in a children's art showing at the university. After a bit of poking around at the showing, we found Ike's art. The tag beside is read, 'Artist: Ike'........and we figured there would only be one Ike there. Ike chose to send in his 'Pumpkins and Ghosts' picture done in wax crayon resist. He did as very careful job colouring in his ghosts with white crayon on white paper before covering it all with black paint....... (Very hard to see where you have coloured).....and it turned out beautifully! And Grampa thinks so too! Congratulations on your first art showing Ike:)


Wednesday, November 4, 2009

Back into School Mode

Order is returning to my daily schedule now and I am starting to think about some new lunch options for Ike. Currently his favourite lunch is just cold cuts, cheese, crackers, sweet pickles, fruit and a cookie or something for dessert. ( today dessert is ginger sparkle cookies and a few Halloween treats) There are so many options when filling a bento box for a kids lunch......I think it might be time to try some new ones. We have tried boiled eggs with ranch dip, avocado salad, potato pancakes and ham, pikelets and fruit and cheese, and small finger sandwiches. I would like to try mini quiches or a frittata slice too. If you have any ideas...please let me know....we'd like to try something different too!
Since being home from work, I have missed the occasional trip to Vancouver and the trip to Daiso that came with it. Fortunately for me a coworker still makes these trips and he has been patient enough to fill my shopping list at Daiso for me. If only I could have a live camera to walk through the store with him. But of course that would only lead to spending more money......But come on.....this stuff is so cute....so kawaii....who could resist. And since it's a $2 store......it's pretty affordable....right?
Aren't those panda bento belts adorable??

Wednesday, September 23, 2009

The Fall Fair and the First Place Button Brooch

The fall fair has come and gone and Ike again wanted to participate with an entry or two. We have enjoyed the Reid Lake fall fair for three years running now and Ike was looking forward to entering a little more that his usual drop cookie entry. This year we chose to make Pumpkin Chocolate Chip Cookies. We have tried a different drop cookie recipe each year so far. I'm not certain if that is the best tactic as we started with our very favourite recipe and have been working our way down the list. Ike was beat out this year by a Chocolate Haystack cookie and came in a close second. Still enough for a nice ribbon and he was pretty happy with it! I had no idea they would allow unbaked cookies in the baking category........well this opens up a whole new world of options now doesn't it. Although.................I'd feel a bit uneasy for the judges tasting uncooked cookies prepared by 'hopefully clean' under 10 year old hands.
This year Ike wanted to put in some extra entries but unfortunately only decided to follow through on this plan the day that the items needed to be delivered to the fair. He did manage to pull together a total of 6 quick entries and his 5 ribbon points total was enough for him to place third in the aggregate points total for his age category. So he got another fancy ribbon and was allowed to choose a prize from the prize table and got some mini putt and drive in theatre passes as well. It was a pretty good time for Ike and he is now driven to place first in the aggregate points total next year. We'll soon see how long this enthusiasm holds out.
Unfortunately a lot of the categories in the fair exhibits tended to be overtly girl oriented so we did our best to pick those options that would be least offensive to his brutish manliness. Some concessions had to be made though due to time constraints and a quick internet craft search and my easy access to copious amount of buttons lead to this very quick and very easy 1st place finishing craft. While I did not have the proper pin back or the glue called for in the 'recipe'....we made do with some duct tape, a safety pin, and my all time favourite '5 minute epoxy glue'.....with only moments to spare. Soon we will replace the make shift back pin with a proper pin back. I was a little worried about having Ike work with the epoxy but it actually gave him lots of time to move things around before it set up. I liked the resulting pin so much I've been mulling over my buttons looking for the perfect assortment for the next brooch.

Monday, June 15, 2009

Need a Hooded Beach Towel?.....Then Make One!

Finally, a sewing project to talk about. With the weather heating up, we have been preparing for our upcoming camping trip to Yellow Stone. This weekend was a practice outing.....yes we practice camping. We took a quick weekend run out to a nearby Provincial Campground and learned a few things.....
  1. You need to bring lots of bug spray.
  2. You should also have an alternate bug plan such as mosquito netting.
  3. You really should pack towels and water toys.
  4. Sunscreen is a good idea.
  5. And lastly your kid's eye can swell nearly shut from just one black fly bite on the forehead....best be bringing some antihistamine just in case.
It was a fun trip aside from the black fly bite!.......and it got me thinking about updating Ike's beach towel hoodie. Ike had received one as a present many years ago and while well used and loved....it's age was beginning to show, and it was getting too small for him. So last year at the end of summer I picked up several large beach towels with the thought of making them into hooded beach towels. After having no success trying to locate a pattern online....I made a copy of the old one....and this is what I did.

Make Your Own Hooded Beach Towel

You will need at least two matching beach towels, preferably with a vertical scene or a random pattern on it. One towel will be for the poncho part and the other will be for making the hood. I got four hoods out of one towel, so I made four hooded beach towels out of five matching towels. The towels do not absolutely have to match...they could be coordinating. The standard inexpensive beach towel like I purchased end of season for $3 each give a length from the shoulder down of about 30 inches and are appropriate for my 7 (almost 8) year old boy who is just over 4 feet tall. Larger towels may be more appropriate for bigger kids. Make sure to measure your kid's head circumference to make sure the size neck hole I've recommended is appropriate. What ever your child's head circumference is, just add 2 inches to that number and divide by two to determine the length of the slash you will cut. The hood piece width may need to be adjusted if you change the slash length as well. It should be (slash length +8 inches)/2. So for Ike's case that's (10.5+8)/2 =9.5". These numbers are just a guideline....you really just want to make sure the length at the bottom of the hood has enough fabric to turn the corner and turn towards the front center of the neckline...you do not need them to meet. See top photo...there is 5 inches of open neckline in the front...an inch or two more or less is not a big deal.
  • Take one beach towel...mine measured 29" by 60".
  • Fold it in half so it is now 29" by 30".
  • You will cut your neck hole 10.5" long centered along the 29" fold.
  • Find the center of the fold and cut a 10.5".
  • I found that cutting a more rounded end to the slash line made seaming around the end of the slash easier. So I made my 10.5" cut look more like a Q-tip than a straight line, by rounding the end cut into a curve. I also came back with the regular sewing machine and reinforced this curved seam as it seems to be a stress point.


  • The front edge of the that will sit across you chest needs to be finished off.
  • I serged this edge all but the outside inch at the ends of the cut, then turned 1/4 inch under (towards the inside or wrong sides together) and stitched it down.
  • The rest of the edge will be finished off when the hood is attached.
  • Cut hood piece from second matching towel.
  • Cut a piece across the narrow edge of the towel to make a strip 9.5" wide, and in my case 29"long. You can check and see that the measurement taken from one shoulder...over the head and down to the other shoulder is less than the 29" length. That way, you'll know that the towel will rest on your child's shoulders...there need to be some slack in the hood depth......or the shoulders of the poncho might be riding up around his ears. 29 inches should be more than safe as it would even be ok for me.
  • The first piece cut will have 3 finished edges. Use the 29" finished edge to be the facing edge of the hood. You can get two such pieces from one towel by using the opposite ends of the towel. If you cut a section from the middle of the towel, you will need to serge one long edge and turn it under, or turn the long edge under 1/4" and press, then turn under 1/4" again and top stitch in place to make your own finished edge. If you are finishing your own edge you should add and extra 1/2 to the width of the cut strip making it 10" by 29".
  • To make the hood, I folded the towel in half right sides together so that my 9.5" by 29" piece was now 9.5" by 14.5".
  • Sew along the cut edge with a 1/4" seam allowance and zigzag over raw edge to finish or use a serger for the seam if you have one.
  • Join the hood to the cut slit with right sides together matching the center of the back of the hood with the center of the back of the towel and pinning in place.
  • Sew with a 1/4" seam allowance and zigzag edge to finish or use a serger for the seam if you have one.
  • And you are done. Once I figured out the error of my threading the serger it only took about 20 minutes to make one.
This is a description of what worked for me, and will hopefully be enough to get you going on one of your own should you be interested. Hope it's helpful!

Friday, March 27, 2009

Hello Spring:)

Doesn't it just look like spring?? Well I didn't think so either as I took my camera with me on the morning walk to school. Would you believe it snowed again....Not much mind you....BUT REALLY!....It's supposed to be melting....not making more......we already have enough.......
Snowbanks like that are not going anywhere very quickly. I have chuckled at people who have taken the time to use their snow blowers on their yard in an attempt to get rid of the snow quicker....but this year.....I'm a little tempted myself. I have never been one to get cabin fever....I enjoy the winter......Christmas for me would be very wrong without snow.....but this one is trying even my patience.
The kids are enjoying the mild temperatures! Warm enough to enjoy the snow play at recess time. And the kids that play soccer and ball hockey on the streets have already been out in shorts. Actually, on this walk to school I spied a kid wearing a hoody and shorts....I should have snapped a photo. But we are all waiting for the big melt! And the signs of it are coming! Doesn't this just look like fun:)

Saturday, February 14, 2009

Easy Teachers Gift Idea


Here is the recipe for the bath bombs Ike made the other day. I first tried this recipe about 5 years ago and gave these to friends and relatives for Christmas. It is really easy and is a project that kids can do with supervision. It can take a bit of trial and error to get the amount of water right, and it is always best to error on the side of too little rather than too much.

Bath Bombs
(makes 6 muffin tin sized bath bombs)
1 1/2 cups Baking Soda (sodium bicarbonate)
1/2 cup citric acid
30 drops fragrance oil or essential oils
food colouring (optional)
water (in a fine misting spray bottle)
molds

Combine baking soda, and citric acid in a bowl and mix well. Add food colouring (if using) start with 6-8 drops and work in with gloved hands. You can do this in a large ziploc bag squeezing and working the colouring through the powder just as you would when colouring sugar. Do the same when adding the fragrance or essential oils. Once the mixture is homogeneous begin to spray water with a fine mist sprayer onto the surface of the powder. Stir the mixture with your hands to bring dry powder to the surface and spray some more. You will have sprayed enough when you can squeeze a small amount of the mixture in your hand and the powder stays together in a clump. Once this happens, DO NOT spray any more. Pack the mixture into molds and press in very hard. The more firmly they are packed, the better! They will be stronger the more firmly packed they are, and will be less likely to prematurely crumble. Release from molds onto waxed paper lined cookie sheets and let dry for 8 hours.

Note:
In my batch I used these ingredients, but you can use what ever you like.

10 drops red food colouring
15 drops patchouli essential oil
8 drops tangerine oil
10 drops lemon grass
the contents of one camomile tea bag

This combination smells like something you would find at lush and has a bright citrus and floral smell. The most time consuming part or the entire process is working the food colouring evenly through. You could likely do this in a blender, but I would NOT add the fragrance oils or essential oils in a blender unless that blender is solely used for craft purposed and not used for food preparation. You can make individual balls by hand (like making snow balls) but you must pack them very tight. You can buy actual bath bomb molds (ball type) at some hobby stores and I have seen them at times in Walmart. But muffin pans works very well, especially the cute seasonal pans Wilton makes. I have used the snowman muffin pans from Wilton which are very cute for Christmas time. They have cute heart pans for Valentines as well. The baking soda is very inexpensive when purchased at the bulk food section of the grocery store and they should also have citric acid available in the pharmacy section. If the citric acid is not available there most health food stores would have some, although I think the pharmacy might be less expensive. Essential oils are available at health food stores and sometimes in the pharmacy section of the grocery store in the homeopathic section. If you decide you really love making bath bombs and want to buy large quantities of essential oils you are better off looking on line.

As I eluded to earlier if you add too much water to the mix, it will become sticky and more difficult to work with. Also and most importantly it will probably stick in the molds. If this happens you can pack them into cookie cutters and you will more easily be able to push them through after packing them in hard. So err on the dry side, as long as it will clump when you squeeze it together, you are good to go. If you pack them in and they won't stay together, you can always dump it back into the bowl and spray more water.

Friday, February 13, 2009

Valentine's Day


We are getting ready for Valentine's Day here and there sure is a lot going on. We had a Cupcake Walk planned for my sons school yesterday and a Girls Night Out Social event planned at the school tonight. That coupled with the usual Valentine's Day preparations makes for a very busy week. The cupcake walk went well and was (I think) a lot of fun for the kids. I had not taken part in one before so it was a learning experience for me. We set up three circles on the gym floor with 25 numbers in each circle. We filled each spot with a kid and played music while they walked around or danced around the circle. When the music stopped each child stood on their number and we drew 10 numbers as winners. The 30 winners then marched off to the cupcake tables to choose their cupcake prize. Those who did not get their number drawn stayed in the circles and the 30 empty spots were filled. And so on, and so on. We had a special cd made of popular music that the kids would like (edited for inappropriate language) and we used the Cuppy Cake Song for the kindergarten classes. Too adorable! We had an amazing amount of cupcakes donated to the walk and received around 800 cupcakes!
Ike just had to make these little fondant bees, so I made these cupcakes to go with the bee theme. They turned out pretty cute I think:) And they were pretty tasty too! For his teachers gift, Ike saved one of the bee cupcakes for her and we put a little pick in it with a sign saying 'bee mine', and we did a little crafting project too. We made bath bombs since they are so quick and easy that kids can actually do it with a bit of supervision.
Now I have just a few hours to tidy up and get moving on to Girls Night Out at the School. We have a collection of over 25 vendors (like Pampered Chef, Avon, Stampin Up, Close to My Heart) and few locally owned businesses setting up tables to sell their wares for last minute Valentine Shopping. Many neighbourhood businesses were kind enough to provide us with a loads of door prizes and we have advertised the event to the entire community. It will be a surprise to all of us to see what kind of turn out we get. Busy, busy, busy:) Gotta Run!


Monday, January 26, 2009

A Quick lunch for Ike

While down in Vancouver picking up my new to me car, I was lucky enough to get to stop in at Daiso....which you may or may not know is my favourite Japanese dollar store. Well actually it's a two dollar store...but that's besides the point. I absolutely love their bento section. We have no availability of this type of thing where I live so I do tend to stock up when I go to Vancouver. Many thanks to Sandra for taking the time to direct me there....not certain if I'd have found it on my own or not? I find that I probably pack a bento box for Ike about once a week just to break things up a bit. It's all finger food in small sizes which is just right for Ike. Anyway, this was his lunch earlier last week. The little yellow container, also from Daiso, contains dip for his hard boiled egg.