Showing posts with label Sewing. Show all posts

Monday, June 9, 2014

Easy Square Pillows


Our weekend turned out to be pretty rainy here.  I was planning to stain the deck....but due to the rain, that did not work out.  Instead....I finally got around to making new cushions for the couch.  The previous ones I'd made were completely dead...and I really liked this velvet fabric....It's a really nice rust colour....more so than shows in the picture.  Nothing fancy....no piping...no trim...since the fabric was pretty heavy......I did not have confidence my machine would negotiate 4 layers.  Four 18 inch pillow forms and 1.5 m of fabric worked out to $10 each. 

Simple Square Pillows

Measure you pillow form across from seam to seam.  Mine were 18 inches across as promised.  Cut 2 pieces of fabric a 1/2 inch wider in each direction than your pillow forms.  I cut mine 18 1/2 inch by 18 1/2 inch.
You need to angle in the corners a bit so you don't end up with really pointy corners.  Set your cut fabric corner onto a cutting mat grid and using a ruler measure in 1/2 inch from the corner on one side and 5 inches down on the other...and cut along this line.  Do the same across the top and you'll end up with something like what we have below.  If you don't have a rotary cutting mat and cutter....just measure in 1/2 inch in from the corner and 5 inches down and mark the line with pencil and cut with scissors.  Make sure to mark both pencil lines before cutting or the second one will be hard to measure.
Do this to all four corners for both front and back pieces.  Place right sides together and sew together with 1/4 inch seam allowance leaving 6 inches open to turn right side out.  Clip corners and turn right side out.  Stuff in the cushion form and stitch closed the opening.


Wednesday, June 5, 2013

A Sewing Project for Teacher's Gift


This little project caught my eye some time ago, so I set up a swap to trade them.  Since my partner has already received this swap....I think I'm pretty safe to post the photo here now.  It was made using the pattern here, and was a pretty quick and, I think,....pretty cute project too.  If you pull the leaves at the top, the keys move up inside of the owl so you can hang them up without keys marking up your wall.  I think I may just make another for an end of year teacher's gift........What do you think??

Thursday, May 2, 2013

What Have You Been Making?


Recently I ran a swap to make a simple wallet using the tutorial from Noodlehead.  This is a photo of the one I sent out to my partner. (It has arrived at my partner so it is safe to post this here without risk of spoiling the surprise)

It was a great little tutorial and I will be sure to make some more in the future using a little stiffer fabric the next time.  I was, in the end, very pleased with the end result and would highly recommend the tutorial.  It's especially nice for a kids wallet as you can pick a suitable print for the look you'd like and it is basic with only 4 card slots and a spot for paper money as well.  

Sunday, January 27, 2013

Catching Up

So it's been a while right?  It's has been so busy here since returning from Christmas break!!  It's always amazing how quickly the time passes by.  We have been fortunate to be enjoying beautiful temperatures for January.  It's been right around freezing.  Let's just keep our fingers crossed that it remains that way.  It makes skiing, snow boarding, snowshoeing, and skating so much more enjoyable:)  Aside from that I've been keeping busy with crafting swaps as well.  One that I just sent off was for these adorable fabric fortune cookies.  They are so darned cute (IMHO) and so very quick and easy to make....it's hard to stop making them.  You may already have on hand what you need to make them.  With Chinese New Year coming up....I thought it might be nice to have some around to give out, or to keep for decoration:)  If you  feel the need to make some.....go here and check out the very simple tutorial and get started!!  You might just find it difficult to stop:)

Sunday, November 18, 2012

Where did the Time go?

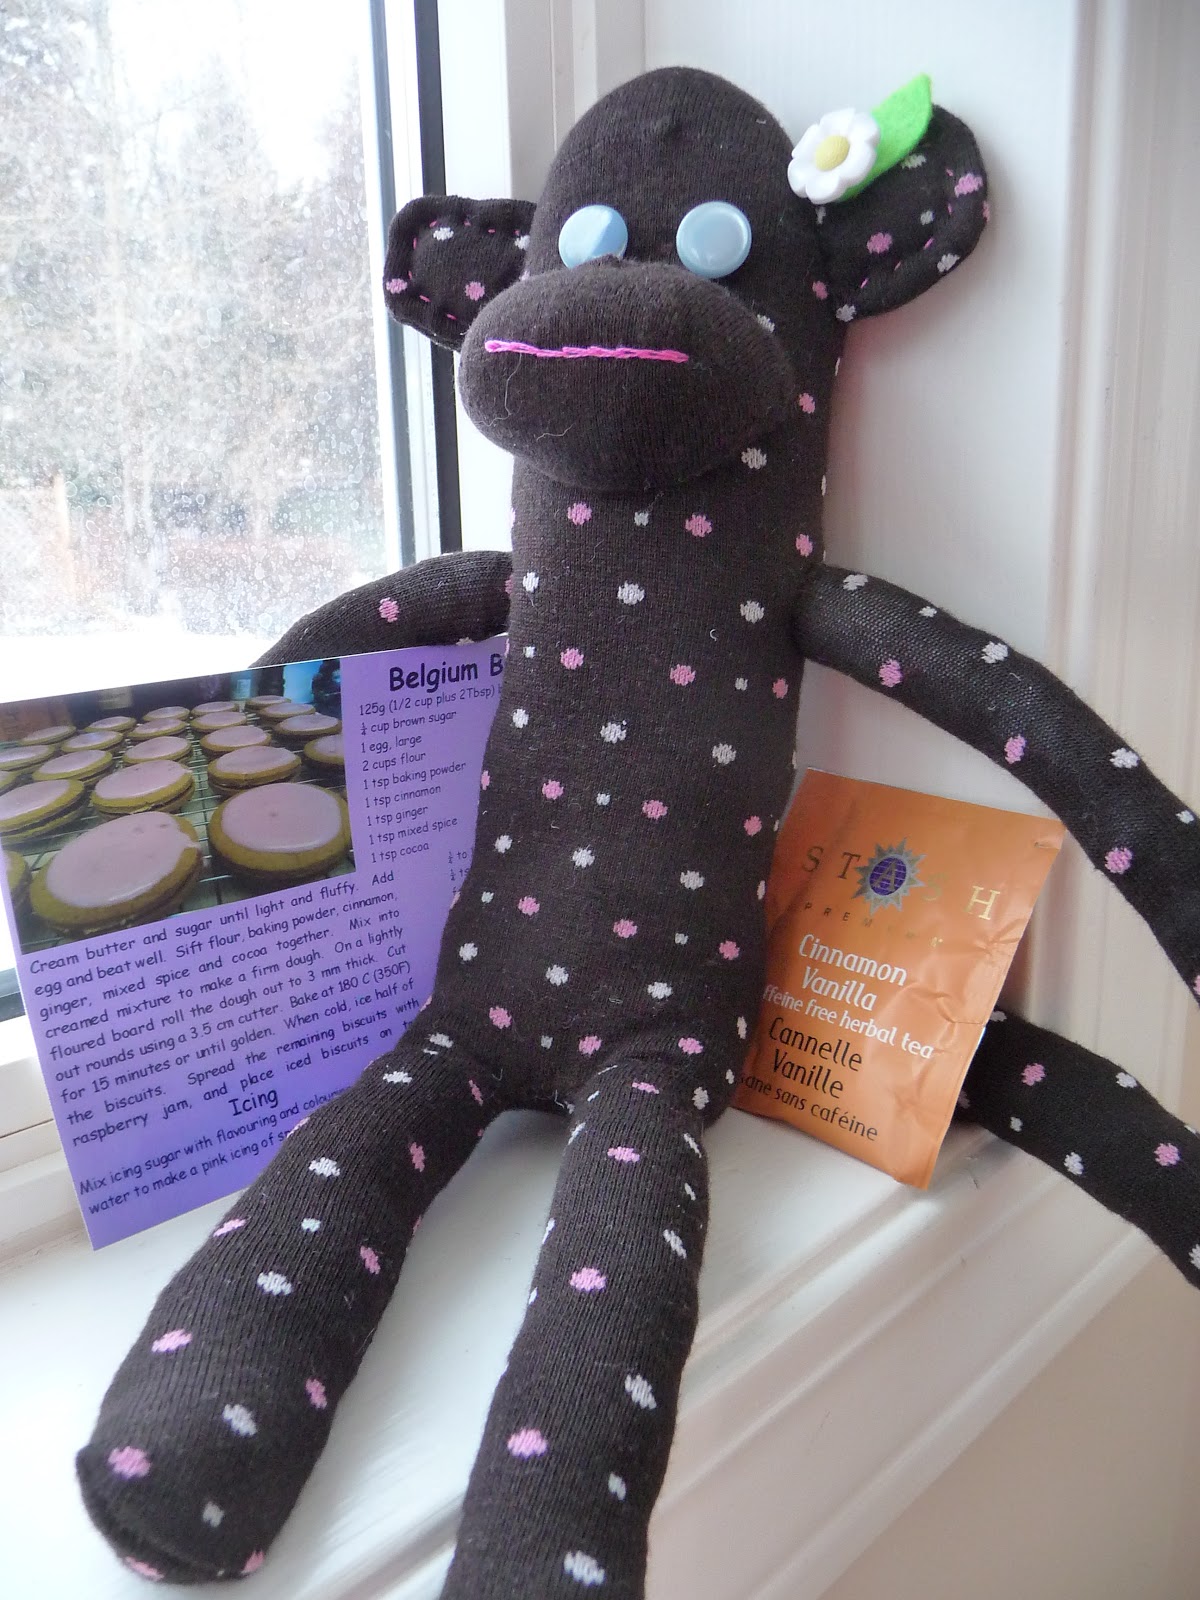
It has been very busy here with work and life in general....But I did take a week off work with no place to go.  Tomorrow is back to work for me, and while I don't feel like I accomplished quite enough on my week off, it wasn't unproductive either.  I managed to get a few swaps prepared and mailed like the felt ornament above.......and the sock monkey below.
 And even managed to finish up and mail some quilt blocks for some nice ladies preparing quilts for the Hurricane Sandy Help quilt project.  The blocks were super simple and I may be tempted to pull out all my vintage sheet fabric to make a lap quilt using this pattern.....just to see how it turns out.
I also took a trip to the yarn shop and bought some beautiful Malibrigo chunky to knit a hat....just need to sew in the yarn tails .....almost finished.......and am just about to start on a knit shawl.  Once they are done, I'll be sure to post a picture......lots to catch up on....and Christmas is coming!  Yikes...

Sunday, September 23, 2012

Peruvian Roast Chicken

My DH faithfully tapes episodes of America's Test Kitchen on our PVR and we watch them when we find the time.  This recipe caught my eye and we decided to give it a try.  I would recommend it highly....You might like to cut down on the amount of salt if you don't like salty things.  While we were fine with it here, my mother made this recipe as well and felt she would cut back on the salt the next time around.  If you'd like to give it a try, make sure you have adequate time for the chicken to marinade....over night is best.

Peruvian Roast Chicken
3 T Extra Virgin Olive Oil
6 cloves garlic
2 Tbsp salt (kosher)
1 Tbsp pepper
1 Tbsp cumin
1 Tbsp sugar
2 tsp oregano
1/4 cup mint leaves
2 tsp lime zest
1 habenero chilli

Combine all in blender and process to a smooth paste.  Lift and separate the breast skin  away from the meat so you can get the marinade under the skin. Smear rub all over the skin of the chicken and place in a ziploc bag in the fridge to marinate for at least 6 hour or over night....time permitting.  Preheat oven to 325 F.  Roast chicken using a vertical roaster or on a beer can for about 40 minutes or until the internal temperature is 140F.  Remove from oven and increase heat to 500F.  Replace chicken continue to roast until chicken is nicely browned and reaches an internal temperature of 160F.  Serve with Spicy Mayo Sauce.  You can also make this recipe as I have with 1/2 chickens, or with chicken pieces.
Spicy Mayo Sauce
1 egg
2 Tbsp water
1 Tbsp lime juice
1 Tbsp minced onion
1 Tbsp fresh cilantro
1 tsp mustard
1/2 tsp kosher salt
1 garlic clove minced
1 Tbsp minced pickled jalepeno pepper
1 cup olive oil
Puree all but the olive oil in a blender.  With the blender running, slowly pour in the olive oil as if to make a mayo.  Consistency is slightly thinner than mayo, and can be poured.  Serve over chicken.


Tuesday, March 20, 2012

A Quick Mug Rug

Another sewing swap went out the door this past weekend.  The swap was for a 'Mug Rug' which is a little spot to put down your coffee or tea with a wee bit of extra room for something else.  Don't worry, I'm not going to try and eat that egg.....it is well past what I would call fresh....it's strictly decorative.  
It was a busy weekend around here, but I did manage to get this swap out just in the nick of time.  Lots going on and lots coming up too.  We are planning a little extended long weekend visit to the Prairies to visit with friends and family while Ike is on his spring break.  That way, Ike will not miss any school, and I can get back a few days of worked overtime.  
Anyway, this little swap was quite a cute one.....and it gave me a chance to try free motion quilting which is something I have been putting off.....dreading actually.  As with many dreaded experiences, its bark was much worse than its bite.  It was....in fact.....quite fun!  So.....I am looking forward to trying it again.....soon!  Certainly, my first try at it was not without mistakes.....but it was no where near as difficult as I had imagined it would be.  The pattern and tutorial are right here....and just in time for a quick Easter gift too!  Seriously....it will be done in an hour.  I will try it again with a thicker batting, I think, and maybe with some binding.  I always think things look better with a binding don't you??

Tuesday, March 6, 2012

Hello...What are You up to??

Well..just checking in to say that I have not yet given up on my first doily project.  You can see from the photo that I have made some progress.  While talking on the phone to my mum the other day, I decided that I should pin out this thing to ensure that it is actually going to lay flat and be at least somewhat roundish at some point.  The cute part of the pattern is just starting to come into view now.......Can you tell what it is??  Probably hard to see just yet......You'll have to wait for another update photo!  Just for a sense of scale....it is now about 14 inches across and should be about 20 inches across when (if) finished.  It has got some uneven tension that I hope will sort itself out in blocking....if it's not too bad that is.  Keeping my fingers crossed.  It is my first real thread crochet doily so I am trying to keep my expectations low to avoid disappointment.  So far.... so good!
I've also been working away at a little swap project that has given me a prime opportunity to try free motion quilting for the first time.  As with so many things...the anticipation of trying this for the first time was much worse than the actual experience.  Again...it's not perfect, but it's only the first time I've tried it.  At least now I'm not afraid to try it again.  So...what have you been up to??

Sunday, September 25, 2011

Repurposed Sweater Project #2- Felted Kitty for Kitty

As eluded to on an earlier post......here is the second small project from my sad shrunken sweater. 
Our cat 'Ginger' has this cute, yet annoying habit of stealing pairs of socks from the laundry and from unguarded cupboards.  Often you could hear her muffled meows as she called for her kittens with one such 'sock kitten' already being carried in her mouth.   She would line them up in a row somewhere safe and get ready to feed them.  I thought maybe she would prefer her own dedicated kitten to some of my sock pairs.......we shall see......I suppose.
I find Ginger likes her soft toys a little squidgy so I don't stuff them very firmly at all.  You could easily increase the size of the pattern to make a nice pillow for yourself as well:)  Go here for the PDF pattern and make yourself a litter.

Sunday, September 18, 2011

Repurposed Sweater Project #1- Felted Fish for Kitty

I have a little collection of wool sweaters which I gathered through thrift store shopping over the past year or so.  I've got a number of small projects in my head that will use up my sweater stash and this was my first easy and quick little project to get it started.  Since I had the sewing machine out to work on my fitted sheet for the 3/4 bed....I thought I'd better also tackle this small project as well.  It took only 20 minutes to complete.  I did not even take the time to make a pattern piece for this.....I just started cutting out the shape of a fish with a folded piece of sweater fabric.  The fold is at the tail end.  
Then I stitched around the shape, (wrong sides together) leaving a 1 1/2 inch opening to turn it.  I chose to make it wrong sides together so that the purl side of the knit would be on the outside when finished.  After turning the fishy purl side out........I filled a little scrap of fabric (from my sheet project) with cat nip and stuffed it inside the little fishy.  
I then made two french knots with 6 strands of embroidery thread for eyes and secured the thread inside onto the catnip bag.  I then closed the opening and secured the thread.  All ready for kitty....

Tuesday, September 13, 2011

Adventures in Making 3/4 Fitted Sheets

That little 3/4 brass bed that we set up in the spare room in our basement has been somewhat 'problemsome'.  Having no 3/4 sheet sets for it (which you can purchase from the Sears Catalogue or from other sources online), not enough time to order some, and lacking the interest to spend over $90 on a set.......left me in a bit of a pinch.  But, in that pinch I decided to use an extra set of sheets I had for the double bed upstairs in our other spare room.  Since the length of the bed is the same, I figured that I would just tuck in all the extra fitted sheet on the back side of the bed so no one would see.  This worked fine for the few nights that company used the room.  But.......I really would like to have a properly fitted set of sheets for the bed now wouldn't I???  And alas, I am much too cheap to pay the required $90+.......So I decided to retrofit the extra double size set that I had on the bed.  Easy right?  Just need to open up the corners at the top and bottom of one side and resew them a bit narrower to fit the 48 inch width of the mattress.  Unfortunately for me with all the gathering from the elastic in the fitted sheet........it was very difficult to see what was going on.  So in the end I decided to cut away the elastic, cut out the corner seams and start with a flat and more manageable piece of fabric.  The sheet was much more cooperative in this form. 
I knew exactly how I wanted to shape the corners and felt reassured by the thorough instructions at this site that I was on the right track.  Well I was a little surprised when I folded the sheet in neat quarters and prepared to trim it to size and cut out my nice square corners....only to find that I could not.  The manufacturer had made a similar corner cut, but not at all in the same orientation as I had expected.  After a bit of thought, I measured out from both folded edges to locate the intersection of the width and height of the mattress.  This point would mark the corners on the top of the fitted sheet.  I decided I would still cut out my squares of fabric, but I positioned the corner of my quilting square just outside of the intersection I had marked the corner and tilted the square to more match the angle of the manufacturers cuts.  
The angle of placement of the square to be removed only affected the direction that the corner seam would take.  So instead of the seam running vertically from the top corner of the mattress to the bottom, it starts at the top corner of the mattress and runs down at an angle.  The more you tilt the square, the sharper the angle will be.  Mine was only slightly angled towards the foot of the bed.
The formulas for measurement and directions from the link above are very useful, and I will not bother restating them here.  
Additionally I would add:
  • Measure your mattress for length and width very accurately and do not add any ease to the measurement as it will be better for the corner points to be a bit inside the top of the mattress than sliding down the side because the measurement was too big.  Mine were a little low but I'm not about to change it now.
  • Using a flat sheet to start with will eliminate the potential to have to deal with the angle of the corner cut although if you do need to angle it the important thing to note is the location of the where the points of the corners will be on the top surface of the mattress.
  • Once you have cut out your shape, it is the easiest to serge or zigzag all edges before sewing your corners closed.  It will be less bulky, the edges will be protected, and no one will see them as they will be under the mattress.
  • Your least expensive option will likely be finding a nice double (full) sheet set to work with.  Buying separates is usually more expensive.
  • I used 22 inch lengths of thin elastic for each corner. 
  • Cats are counter productive when it come to making the bed.
I have a wool blanket wrapped around the mattress as a mattress protector since the mattress is original and it kind of creeps me out.

Sunday, July 17, 2011

A Little Stitching

We are back.....just in case you noticed....we were gone!  We had a 2 week road trip down to and around Vancouver Island.......and we just pulled the camper van back into the driveway last night.  We saw and did many things and had a great time (aside from my cold....but I'm such a trooper....I forged onward regardless)....but a post on all of that is yet to come as we encountered a slight issue with photos requiring a bit of salvaging as many were inadvertently deleted.....oops.  (I wasn't by me, this time.....thank goodness)  But more on that later. 
One of the things I noticed about Vancouver Island is the alarming number of thrift shops and also antique shops if you are feeling a little more spendy.  I did manage to make one purchase in the thrift shops, and one in an antique store as well.  Being limited on space in the camper van....I limited myself to fewer purchases than I might have otherwise made.  The towel pictured above was a great thrift store find I made locally some time ago and found the perfect use for in an embroidered tea towel swap before leaving on my trip.  In retrospect, I might have chosen a brighter pink for the pink flowers........oh well too late now...........and the lady who received it is more than capable for fixing that if it is bothersome.   Now, I have three more of these towels in the cupboard waiting for a bit of embellishment.........I wonder what I should try next? 

Tuesday, March 29, 2011

A Sensible Matryoshka Bookmark

I have tried to be a little more sensible about some of the swaps I've been taking part in lately.  It is immensely fun to send and of course receive mail from all over the globe.  Just the stamps alone make it interesting.  The only 'fly in the ointment' on the fabulousness of swapping.....is the postage.  And Canada Post has some of the steepest rates:(  However....if you keep it to flat swaps that can fit through the 2 cm measuring slot....it is not considered package mail and the rates are slightly more agreeable.  So I always hope to be able to flat mail swaps in the interest of saving money.  I'm sure you can guess how frustrating it is to find that just because something is too thick for the 2 cm slot the postage goes from $2 to $6 or more.  In the interest of more flat swapping.........I decided to join a swap for handmade bookmarks.  That's pretty flat right??  Now my little flat and sensible Matryoshka is off to Kuala Lumpur......I hope she has a nice flight:)

Saturday, March 19, 2011

Weekend Project- A Quick Pincushion

I'm back from a week long business trip in the US.  Phoenix was unseasonably warm and much quieter than I had expected for such a large population.  It was a good time, the highlight of which was definitely the day spent at the Bondurant Racing School.  It is always fun to drive in ways that would get you a ticket if you were to drive that way on public streets!  But now, it's the weekend and it's good to be home sorting laundry, unpacking and trying to catch up on what needs to be done next.  Somehow, in my absence, an entire tin of baked goods has escaped the notice of the boys......so I still have treats just in case someone pops by:).......of course the more likely out come is that I will eat them.....one by one.  
The chocolate slice and ginger slice are both good New Zealand recipes that have now become favourites here........let's just hope I can keep my hands off of them.......but I can't promise anything:)
After making breakfast for the boys, I started on my little list of things to do.  The first on the list was to get out a few swaps that have been sitting and waiting for a few last minute additions.  The pincushion above, I'm happy to say is finally completed and ready to go out the door.  For such a quick and easy project (less than an hour to complete)......I am too embarrassed to tell you how long I let it sit half completed.  Well now that monkey is off my back, and it is soon to be mailed. If you'd like to make one.....it really is an easy and quick project......go here for instructions.  ( I like to put a layer of steel wool in mine to help keep the pins sharp....but this is not necessary)  Or if you'd like to buy one already made......have a look here.  She also makes very nice crochet hook rolls which I highly recommend:)  Hope you have a great weekend!

Wednesday, February 9, 2011

A Quilt Ready to Go

Finally.....it's finished.  It is my habit to put off things which I find intimidating and this project was no different.  Although, in the time I wasted....waiting to quilt this project.....I could have done it by hand.  But I wanted to try machine quilting.  What I really wanted to try was free motion quilting....but I think that might be better for a smaller project to start with.  So for this one, I decided to just do random straight line quilting with some hand dyed thread.  It took much longer to do than I would have thought considering I was using the machine.....although admittedly at quite a slow speed......since I don't know what I am doing.  The binding went on in an evening which was the most enjoyable part of the project for me.   Now this little quilt is ready to mail and another project needs my attention. Next I'll try to finish off the Harry Potter letter sweater I started for Ike.  Hopefully I will get to that with a little more speed than this one!

Sunday, February 6, 2011

A Busy Weekend

It was another busy weekend!  Saturday morning brought a request for waffles........which normally I would have prepared for the night before........but given no advanced notice this time.....I decided to try the quick waffle recipe from the Belgian waffle maker cookbook.  It called for baking mix, which is something I have never bought and I really didn't feel like going to the store....plus what would I do with the remainder of the box????  So I decided to make my own.  I used this recipe  following the  instructions for waffle batter  (it was the same recipe as the one from the Waring  Waffle cookbook anyway) and made a half recipe which was more than enough.  Ike did not even notice the difference......but of course DH did.  So I guess I'd make them in a pinch.....they were ok.  But I'd agree with DH.....the yeast recipe for Belgian Waffles is better....The extra is now in a zip lok bag in the fridge waiting for it's next use. 
Then on Sunday, after a few hours at the snow board hill I decided I'd better make some progress  on this old project.  So here we have it....progress.
Now it just needs to be bound.  Stay tuned for the finished picture within the next few days.  Hopefully without help from the cat:)

Friday, June 11, 2010

Ribbon Flowers....Ribbon Leaves

Here are the instructions for making the ribbon flowers and leaves I used in making the china pincushion from the giveaway in my last post.  If you need a pincushion don't forget to leave a comment on the  previous post.  I really do love how these turn out and have used them to embellish bags, pin cushions, garter belts and dolls so far.  I'm sure their uses are many more than I have tried.  Maybe you can think of some even better ones....they are dead easy, so give them a go if you think of a good use for them.
Ribbon Flower
  • Cut a piece of ribbon with a length 9 times it's width. I really like to find soft ribbon for these...you can even use wired ribbon...but remove the wire from the side along which you will be sewing.  The remaining wired edge will allow you to shape the outside edge of the flower nicely.
  • With a thread colour that matches the ribbon, tie a knot in the end of the thread. (I have used a contrasting thread here as it is easier to see in the photo)
  • With ribbon laying flat,(for descriptive purposes only......hold it how ever you like when you sew it)  sew with large running stitches starting at the top left and moving down, then across the bottom and finally up the right side as shown in photo. Don't make delicately small stitches here....long ones will gather better!
  • Now gather the ribbon down by pulling on the thread and needle and bunching the ribbon towards the knotted end where you first started stitching.
  • Move the ribbon with your fingers into a circular shape with the ends of the ribbon tucked on the underneath side.  (Ideally you will treat the ends of the ribbon with fray check to prevent unsightly threads from unraveling from your flower)
  • Once you flower is shaped the way you like....stitch a few stitches on the back side of the flower to knot everything securely.  Leave the long length of thread hanging from the back and use this to attach your flower when you are ready. 
  •  You can also use this thread to attach beads to the front of the flower at center and then return the thread to the back side for later attachment.
Ribbon Leaf


  • Cut a piece of ribbon with a length 6.5 times or more it's width.  
  • Treat ends with fray check or even white glue will do.
  • Fold the ribbon in half (as in photo above left with fold on the left and cut ends on the right)
  • Take a piece of matching thread with a knot in the end and sew long running stitches starting at the fold and running along the bottom edge (sewing the two layers together) all the way to the cut ends.
  • Now, gather  the long edge and sew a few back stitches to hold the ribbon in place, (so it remains gathered and then sew running stitches (smaller ones this time as this will be a seam and if not gathered) up along the cut edges (sewing the two layers together).
  • Back stitch to fasten......but do not gather the cut ends.
  • Open leaf with stitching to back and finger press to the shape you like.
  • Use remaining thread to attach leaf by hand stitching to its final position.
  • Now open up leaf and press it into shape with your fingers
When it comes time to sew your flowers and leaves onto your chosen background......keep in mind that the leaves should be sewn into position first, then the flower last......so place them where you'd like with pins first and then start sewing with the leaves.

Thursday, June 3, 2010

Vintage Luggage Weakness

I am, as anyone who knows me well could probably confirm, quite a little pack rat.  It is very difficult for me to throw out anything.........I ALWAYS have some notion of what future use it might have.......and throwing it out would be simply wasteful!  Right??  Hmm I wonder if that has anything to do with the difficulty I have in keeping the house tidy..........na......probably not:)
I am trying to be a bit better about throwing out things that I might never get around to 'turning into a project'........but I admit....it's hard:)  Quite a few years ago I spotted these beautiful vintage pieces on the internet and thought about making one for myself.....How hard could it be ?????  Really!!  As yet I have not got around to it, but I have managed to find a few vintage suitcases.......should I ever get all the questions in my head answered about how to complete the project.  
For now......I'm just using this vintage case to hold some sewing supplies......sometimes.......I just like to open it up and look inside.   It makes me smile:)

Sunday, May 30, 2010

Help! What do you Think???

Yes I know......a few weeks ago I started cutting squares from 20 or more vintage sheets to put together for a little vintage quilt project......and shortly after that I did sew them up for the quilt top.  But not much has happened with it since then so this is where it's at.  After much deliberation........I decided to not make it any larger as I am going to be sending it off for a baby gift.  (Right now it is 40X50 inches or 100X128cm)  Now my problem is to decide which colour would be best to use for a binding around the edge....any ideas???  I was thinking green.....but quite honestly, I could change my mind....hhhhmmm.
 And it's hard to accomplish much inside when there's so much going on outside:)  The  pale pink peonies are getting ready to blossom....I'm so excited.....they are one of my favourites.  And the black currants are making berries too:)
I am hoping that they will make a delicious syrup for waffles and pancakes later this summer:)

Monday, April 12, 2010

Slow Progress

I am making some progress......slow as it may be.  After two years of searching out vintage sheets to have enough variety to do something with.........I finally started cutting.  It is clear to me now if it wasn't before.....that I am a planner.......sometimes not so big on the execution.  That's why I like craft swaps....it's those sending dates.....I need them!  Without a promise or obligation to complete a given project at any particular time.......the project might lay uncompleted for years.  This vintage sheet quilt project has been on my mind for a long while now and hopefully since I have no completion date......it will get done.
I've got over 150 (6 1/2 inch) squares cut now from over 20 different sheets, (thank goodness for rotary cutters) and I'm getting anxious to arrange them in a pleasing layout and to choose a binding colour.  I had a really fun time accumulating these totally groovy sheets........the pattern that I had on my bed when I was little is even among these.....can you guess which one??  Do you see any that you recognize??  Tomorrow I start sewing......hopefully.  Sewing the quilt top will be OK, I'm not worried about that....but I am stressing....yes stressing about free motion quilting.  Never tried it before and I am getting very nervous about it!  So if you never see the finished project from this neat little pile up on the blog.......please bug me about it, so I finish it:)