Sunday, November 28, 2010

Favourite Things Giveaway ....While I have some Crostata

This contest is now closed.  Thanks to all who entered!
With Christmas preparations well under way....(doesn't it just look like Christmas here???) what a perfect time for another giveaway!  Those wonderful folks over at CSN have offered to sponsor another giveaway here.  This one is for a $65 gift code that can be used at any of their 200+ stores and can be delivered to any US or Canadian address. Please take a peek at some of their stores which offer anything you can think of from Bathroom Furniture to gorgeous Kitchen Wares and all points in between.  There are so many options.....I'm just going to take a piece of Pear & Blue Cheese Crostata from this month's Bakers Challenge to sustain me through the hours of window shopping at CSN.  So please feel free to enter for your chance to win a $65 gift code for some fine CSN shopping.

The Details
  1. This Giveaway is open to anyone with a US or Canadian mailing address, as CSN will ship to either location.
  2. To enter the draw for the $65 gift code from CSN please leave a comment at the bottom of this post telling me your favourite holiday food.  Is it the turkey???  The stuffing??? Steamed pudding???  I'm curious.....so tell me!
  3. You can enter one time by leaving a comment on this post......and you may leave one additional comment on this post if you are a follower......mentioning that you are a follower of this blog. (a way to say thank you to you super nice followers)  so that is a maximum of two entries.  
  4. Make sure that there is a way for me to contact you should your comment be chosen.  Either leave your email address written in the form jane(dot)doe(at)hotmail(dot)com (so you don't attract spam) or make sure that your blogger account etc. has an email address in it that I can access.
  5. The winning comment will be selected using a random number generator at the end of the day on Wednesday December 8th.
  6. The winner will be contacted by email on December 9th.  If the winner cannot be contacted within a few days.....a new winning comment will be selected.....so please leave your contact information.
  7. Please do not leave links to other businesses within the comments.
This Month's Challenge.....Crostata....that's pie!
Now have a quick look below to see the recipe from this month's great Baker's Challenge.  The 2010 November Daring Bakers’ challenge was hosted by Simona of briciole. She chose to challenge Daring Bakers’ to make pasta frolla for a crostata. She used her own experience as a source, as well as information from Pellegrino Artusi’s Science in the Kitchen and the Art of Eating Well. Using the pastry recipe provided by Simona we were permitted to find a filling that appealed to us.......I chose to make a rustic pie baked on a cookie sheet with the edges folded in......and pear and blue cheese sounded intriguing to me.

Pear and Blue Cheese Crostata
Filling
4 small to medium pears, cored and chopped
3 tbsp crumbled blue cheese
1/4 cup flour
1/4 cup golden sugar
1/4 cup chopped walnuts or pecans
3 tbsp cold butter, cut in small pieces
honey, to drizzle on top

Preheat oven to 450F.
Set cut pears aside.  Roll pastry out into a 12 inch circle, and transfer onto a parchment lined baking sheet.  Spread pears over the middle of the pastry leaving 1 1/2 inch uncovered at the edges.  Scatter crumbled cheese over top of the pears.
Combine the flour, nuts, and sugar. Pinch in the butter until it is like a crumble.  Pour this topping over the pears and cheese.  Fold in the outside edges to make a circle.  Bake for 25-30 minutes until crust is golden brown.  Allow to cool for 10 minutes.  Drizzle with honey just before serving.

Sunday, November 21, 2010

Top 10 + Kitchen Gadgets- For Christmas

With the gifting season fast approaching, the influx of colourful flyers into our house is enormous.  There are so many purchasing options out there.  And for me at least, it seems that quite often now....my best chance of getting the item I'd like at the best price (or at any price in some instances) is online.  If you have a foodie in your life and are perplexed as what on earth to buy for them........maybe I can offer a few suggestions.  Here are a just few things that I have found either indispensible.....handy or otherwise just plain cute, and now consider them to be on my 'must have' or at least my 'would like to have' list.
  1. A proper chef's knife. ($75-$150) If you don't want to spend ridiculous amounts of money....just get a good 8 inch chefs knife....you don't need to go out and buy a whole set.  There is very little more annoying than trying to prepare food with poor quality knives, and a basic 8 inch chef's knife is the very least you should need and will get you though the majority of your knifely needs.  In subsequent years you might like to broaden your collection and pick up a bread knife, smaller utility knife, filleting knife....you must think about the tasks you are most likely to do to determine the best choices for you.  While my knife block holds 7 knives, I find that I predominantly use 3 of them.  The 8 inch chef's knife, the 8 inch fillet knife and a 7 inch carving knife.  You should be able to pick up an 8 inch chef's knife for about $120 (in Canada....likely cheaper in the US). Places to look are, department stores like, Sears, The Bay, Home Shops, Kitchen specialty shops, Knife specialty shops or online......or even eBay. Brands to consider include Henckels or Wusthof.  If you choose to purchase online....take the time to go into a store and handle the knives you are considering.....it's good to make sure it will live up to your expectations.  If you find out the following year that the knife that you so thoughtfully gifted is being mistreated.....(ie stored in a drawer instead of a proper knife block or God forbid not being sharpened).......please rescue it and bring it to a good home. Keep in mind that some people have superstitions about giving or receiving knives as a gift so they include a penny along with the knife for the receiver to give the penny back "to pay for the knives"....so then they are not a gift.  As an alternative for a much less expensive knife....have a look at the Victorinox Fibrox....well rated and very popular in commercial use kitchens.
  2. Stainless steel measuring spoons and dry measure cups.  Everyone should have these....they are not expensive and will last a lifetime.  If you can find narrow measuring spoons like these they are super handy for measuring out of spice jars. You should be able to find these in any kitchen shop for about $15.   Places like Winners or HomeSense or TJ Max are good places to look.
  3. The Zyliss garlic press.  If you cook with garlic (we use a lot) you will wonder how you lived without one.  They are inexpensive at about $15 and do look for the one with the matte finish that is dishwasher safe.  One of my best buys ever!  It's easy to use and easy to clean......you just pop an unpeeled garlic clove into the hopper and squeeze.  Readily available at kitchen stores and department stores.
  4. Silicone Spatulas.  Very useful and safe with your non stick cook wear.  Look for ones that fit well in your hand....not one with sharp or angular contours.....and stay away with ones with wooden handles if you are planning to wash these in the dishwasher.  I am now, after at least 10 years looking to replace my le Creuset ones as they no longer fit tightly to their (removable) handle.  Plenty of inexpensive and fun looking options out there for under $10.  Try looking in places like Winners or TJ Max for the best deals.
  5. A stand mixer.  ($250-$400) If the person you are buying for likes to bake.....they will love one of these! Perfect for cookies, cake batters, dough, whipping cream or egg whites..... My DH bought me one of these several years ago and I believe I've more than got my monies worth out of it. I can only comment on the Kitchen Aid models.  I have the Kitchen Aid Ultra Power 300 watt model with the tilting head and 4.5 quart bowl.  For regular batch baking or even a double batch of cookie dough, this is a good size. The best deals that I have seen for Kitchen Aid Stand mixers have been at Costco and on the Home Shopping Channel. Costco sells the larger 5.5 quart drop down bowl mixer with 575 watt motor for $399 in Canada or $299 in the US.  Several times per year it is on sale for $100 off here.....and near Christmas time is one of those times. The Costco unit differs from mine in that it has a larger motor......a larger bowl.......and rather than having a tilting head.....it has a drop down bowl. (If you are from the US......now might be a good time to pick one up as they are on sale right now for $250 plus $15 S&H.)  My preference is for the appearance and stature of the tilting head model as it fits under my cabinets where the larger unit would not.  Also I much prefer the tilting head for the convenience of changing attachments rather than the drop down bowl which creates a congested space in which to change beaters.......it doesn't drop down quite enough to offer a lot of free space to get your hands in. That being said I ....could get over the bulky appearance and awkwardness of the drop down bowl for the extra watts and larger capacity.  I have, on more than one occasion feared for the life of the motor on my unit when mixing a heavy dough.......and I am a fairly moderate baker.  Note that Costco has $100 off right now on the Cuisinart stand mixer with a 1000 watt motor...The Cuisinart model might be worth a look.
  6. Digital Kitchen Scale. ($15-$60)  I originally purchased myself a kitchen scale for weighing parcels for mailing over seas.  If you understand the price structuring of Canada Post and do a lot of overseas shipping.....then you understand how useful your own scale is to own.  Since I have one of my own......I have over time discovered how handy they are for measurement for recipes as well.   If the person on your Christmas list gets a lot of recipes off the internet....then this might be a handy tool for them.....no more guessing how much 200g of sugar might be.  Inexpensive and useful once you get used to using it.
  7. Instant read thermometer.  ($15-$100) After watching countless hours of America's Test Kitchen......my mother became sold on the idea of owning a Thermapen......and to my good fortune she gifted one to me as well.  No more worries about knowing exactly when something is 'done'.  It has been extremely useful for cooking meats, sauces, candy, and even bread.  Bread was always the one that I could never get just right since I don't make to so often that I have a feel for it.  Well....for white bread.....it's done at 200F.....and a little poke with the Thermapen and the wondering is over!  There are a few models available and it is most easily found ( at least where I live) online.  There are also some on eBay right now for a good price.....some are the latest model which prices out at $96 plus S&H straight from Thermoworks  and there are a few of last years model which are only 1 second slower in reading...but with a much improved price...have a look. (the image shown is the latest model....But I think the auction is for the older model....still an awesome price)  And this is the best price I've seen on the latest model.  If that seems a ridiculous amount to pay for something that you are not quite sold on the virtues of.....then there are some less expensive ones to choose from (under$20) as well.
  8. A Bamix immersion hand blender. ($139-$300) I purchased a Bamix just before my son was born.  I'd seen them in home shows and been impressed with their power.  Want to make your own peanut butter, whip skimmed milk for a no fat substitute to whip cream,  make your own frozen fruit sorbet instantly, make idiot proof mayo, instant smoothies, make your own puree or baby food, puree soups in the pot........this is the right tool for the  job.  Solidly constructed....will last your life time! Easy to use......crazy easy to clean!  Look for them at home shows, and online kitchen sales and on places like eBay........if you're super lucky....in a garage sale:)....although perhaps not the best source for gift giving.
  9. Kitchen Cuteness is all over the internet if not in your local kitchen supply store. ($10+) M cups Matryoshka Doll measuring cups by Fred were much cuter than I could resist...you might feel the same:)  Or these condiment bottle caps  over at Perpetual Kid might be up your alley if you are looking for something a little silly.  Perpetual kid is well worth a look around in either event.  And you could pretty  much buy me anything made by Pylones......and I would love it. They make gorgeously frivolous items for those who already have all that they need.  You really must go and check them out.....every time I go to Toronto I stop in at William Ashley China shop and inevitably pick up another Pylones item from their kitchen section.  The first piece of Pylones merchandise I ever saw was their toaster.......very cute!  They make a beautiful hot thermos as well, which Star Bucks has carried at times....you can often get these out of season at excellent pricing.
  10. Cup-A-Cake Holders ($5+)  I cannot even remember where I initially saw these.....I think it was in a kitchen shop in Vancouver 2 or 3 years ago.  Well I finally caved in and bought some for myself.  They are absolutely the perfect thing for carrying a cupcake safely in your lunch without so much as a smoosh to the icing.  The individual plastic cupcake holder opens hinged like a book with a spot reserved for your special cupcake.  Plastic prongs catch the cupcake just above the paper liner's edge so that your cupcake will not move inside it's protective cocoon.  We have been using them for a few weeks now for lunches and just love them to bits.  The hinge is plastic......so I think it's only a matter of time before that part fails.......but I bet it takes a few years.  Best prices on these were found directly from the Cup-A-Cake people, but you can find them on eBay as well.
  11.  Cook Books. ($10+)  As a last suggestion.....cookbooks are nice to curl up with with a cup of hot cocoa.......There are lots of online options with plenty of time for delivery and in many case free shipping....have a look at some of these. And if someone you like...likes America's Test Kitchen...Like I do...then might I suggest ....this book.
  12. I could go on and on....but that's for another post.....
I hope you find some useful suggestions here........and there is still plenty of time before Christmas.......So let's not leave it to the last minute! Happy Shopping!  Stay tuned as there is a Give Away coming very soon (tomorrow if I get it all together) which just might help you in the purchase of some of the above mentioned gift ideas.

Monday, November 15, 2010

Baking Day Cinnamon Buns

Yesterday was a huge day of baking......sometimes that's just how things work out.  I needed to get my Daring Cooks Challenge out of the way (and I was pretty excited to make and eat my first souffle)......I needed to use up some more cream cheese......so I made some more Chocolate Cheesecake Cupcakes........and someone has left a comment saying that they used the Air Bun recipe to make Cinnamon Rolls.......So I just had to give that a try too!  Needless to say, we did a lot of sharing with the neighbours.  And......I'm happy to report that the Air Bun recipe did make fantastic cinnamon buns.  If you'd like to try a batch......go here for the bun recipe and fill with the Filling Recipe below.
Cinnamon Bun Filling
1/2 cup softened butter
1 cup brown sugar
2 tsp cinnamon
1/4 cup chopped walnuts or pecans (optional)
1/4 cup raisins (optional)

Mix first three filling ingredients together and cream until smooth.  Pop it in the microwave for just a few seconds if it isn't going to be easily spread....careful not to melt it though.....just to soften.  Add optional ingredients and set aside.  Move dough to counter and roll out 10"X20" in as much of a rectangle as you can.  Spread filling and roll up along long edge so you have a 20" long roll.  Slice with a sharp knife into 12 -15 equally sized rolls and set in a pan to rise.  Let rise in a warm place for 30- 45 minutes until doubled in size.  Bake for about 20  minutes at 350F or until internal temperature reaches 200F.  Remove to rack and cool slightly before icing.

Cinnamon Bun Glaze
1/4 cup butter melted
2 cups icing (confectioners) sugar
1 tsp vanilla
2 tbsp hot water
Mix melted butter, powdered sugar and vanilla until mixed in well.  Add water 1 tbsp at a time while beating...just until the glaze reaches a spreading consistency....Spread over slightly cooled rolls.

Sunday, November 14, 2010

Back with a Daring Cheese Souffle

I was a little sad to miss out on last months Daring Cook's and Baker's challenge...but things were really just too hectic to do them.  But I am back at it with this month's daring cooks Challenge.  There is lots on the go here as always seems to be the case....it's actually a very busy day of baking here as I will post about later.  But for now...here is the November Cook's Challenge.
Dave and Linda from Monkeyshines in the Kitchen chose Soufflés as our November 2010 Daring Cooks’ Challenge! Dave and Linda provided two of their own delicious recipes plus a sinfully decadent chocolate soufflé recipe adapted from Gordon Ramsay’s recipe found at the BBC Good Food website.

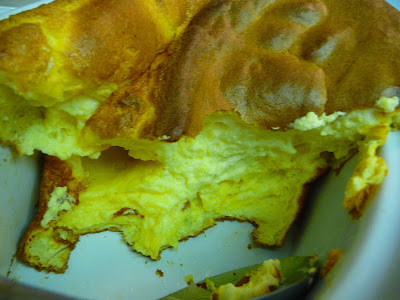
Now I was pretty excited to learn that the November Challenge was to make a souffle.  This is my first and hopefully not my last attempt at a souffle.  It was the perfect accompaniment for a lunch with the early winter weather we have been having. I  wavered back and forth on what kind of souffle to make....and in the end decided to make a basic cheese souffle to start out with.  There seems to be no end of sweet baking going on here so a savoury concoction was most definitely in order.  We had the souffle for lunch this afternoon with a nice bowl of tomato soup.  I chose to try a recipe off the internet from Alton Brown.
Cheese Souffle
2 Tbsp parmesan cheese
1 1/2 oz or 3 Tbsp butter
3 Tbsp flour
1 tsp dry mustard
1/2 tsp garlic powder
1/2 tsp salt
pinch of cayenne pepper
1 1/3 cup hot milk
4 egg yolks
6 oz sharp cheddar cheese
5 egg whites (room temperature)
1/2 tsp cream of tartar
Grease an 8 inch souffle pan with softened butter and coat with grated parmesan cheese, by dumping the cheese in to the greased pan and turning the pan.  Preheat oven to 375F (you will be using only the very lowest rack in the oven).Heat butter and add flour, dry mustard, garlic powder, salt and cayenne pepper to make a roux.  Cook 2 minutes.  Whisk in hot milk and bring to bubble for two minutes.  Remove from heat.  In a small bowl, lightly beat the egg yolks and temper them by beating in a few tbsp of hot roux into them.  Pour egg yolk mixture into the roux and whisk constantly.  Add grated cheddar and whisk to incorporate.  In a large bowl whip egg whites and cream of tartar to firm peaks.  Add 1/4 of the egg whites to the roux base and fold in well.  Add the remaining egg whites in thirds, folding gently.  Fill pan to within 1/2 inch of top making sure edges are clean and buttered.  bake 35 minutes until cake tester poked into the center comes out clean.


Thursday, November 11, 2010

A Month of Cookies-Something Different for the Cookie Tray-16

When gathering recipes for your holiday cookie offering, it's nice to have some drop cookies, some shaped cookies, and some rolled cookies.  I also like to throw in some of these Chocolate Cheesecake Cupcakes in the mini muffin size as shown above.......since: 1) I love them.....2)They are quick to make ...3)They freeze well...4)Did I mention they are delicious??
Now, I make these so often I'm sad to say that the recipe is pretty much committed to memory.....and if you try them....I bet you'd love them too!  These ones are on their way to the Remembrance Day ceremonies here in Prince George.  Ike is excited to take part in the parade with all the other Cub Scouts even though I doubt he can fully grasp it's significance.  So just in case I've convinced you to try them....here is it......the recipe.
Chocolate Cheesecake Cupcakes
1 1/2 cups flour
1 cup sugar
1/4 cup cocoa
1/2 tsp salt
1 tsp baking soda
1 tsp vanilla
1 tsp vinegar
1/3 cup oil
1 cup water
Dump all of the above into a large bowl and whisk together, set aside while making topping

Topping:
1 ( 8 oz pkg) of cream cheese at room temperature
1 egg
1/3 cup sugar
1 cup chocolate chips
pinch of salt

Cream together the cream cheese and sugar, add egg and salt and combine till smooth.  Stir in chocolate chips.
Preheat oven to 350F.  Line 18 muffin tins with paper liners.  Divide chocolate batter equally into each of the 18 muffin cups.  About a rounded tbsp for each.  Top with a rounded tsp of cream cheese topping. Bake for about 18 minutes or until the cream cheese topping begins to brown in a few spots.

Monday, November 8, 2010

A Month of Cookies-Chocolate Cherry Chip Drop Cookies-15

Cookie #15, is submitted for your consideration by my very own Ike.  Ike made and entered these cookies into a little fall fair close by our neighbourhood.  He has been entering cookies and other items into this fall fair for four years now, and this is his 3rd first place cookie submission.  It is not clear from the photo, bur they are a chocolate drop cookie filled with white chocolate chips and dried tart cherries.  They are soft, chewy and chocolaty.....all very good qualities for a cookie....I think.  If you like chocolate cookies....this might be just right for you!  Give them a try......Ike thinks you'll like them.  Ike sold 100 of these cookies along with about another 100 Ginger Sparkles at a cookie stand this summer to raise money for Cub Scouts outtings.

Chewy Chocolate Cherry and White Chip Drop Cookies
1/2 cup plus 6 tbsp soft butter
1 1/2 cups white sugar
2 tbsp molasses
1 egg
1 tbsp vanilla
1 tsp salt
1 tsp baking soda
1 1/2 cup flour
1/3 cup cocoa
1 cup dried cherries
1 cup white chocolate chips
Cream butter and sugar. Add molasses, egg, vanilla, salt and soda.  Mix in flour, cocoa, and cherries and chips.  Drop by teaspoonful and bake at 375F  for 8 minutes.

Sunday, November 7, 2010

A Month of Cookies-Cherry Chip Oatmeal Drop Cookies-14

Since I didn't get to finish up the October cookie submissions....like I'd planned to.......I decided I'd just put them in when I can.  Cookie #14 is a tasty and chewy oatmeal cookie.  I thought I'd better grab a photo of them before they are all gone.  You can double the batch if you'd like.....which might not be a bad idea if you're doing cookie exchange.  A double batch makes about 100 cookies.   They are also a nice nut free option for sending into a nut free school.  I really liked the flavour combination of the dried Montmorency cherries and the chocolate chips......and even though oatmeal cookies are not my favourite.....I actually liked these for their flavour and chewy texture. 

Cherry Chip Oatmeal Cookies
1 1/2 cups flour
2 tsp baking soda
1/2 tsp salt
3/4 cup sugar
3/4 cup brown sugar, packed
3/4 cup butter, softened
2 eggs, large
2 tsp vanilla
3 cups rolled oats
1 cup dried tart cherries
1 cup chocolate chips

Preheat oven to 250 F.  In small bowl, whisk together flour, soda, and salt and set aside.
In a large bowl, cream butter and sugars.  Beat in eggs one at a time and then add in vanilla and mix in.  Stir in flour mixture. Stir in oats, dried cherries, and chocolate chips.  Drop dough by rounded spoonful, 2 inches apart on non stick cookie sheet.  Bake until tops are golden, 10 to 12 minutes.  Let sit a few moments on cookie sheet before transferring to wire rack to cool.

Monday, November 1, 2010

A Happy Hogwarts Halloween

Ever since Ike as been old enough.....I  have encouraged him to choose his Halloween costume, and I do my best to make something fitting his description and also something warm enough for the weather.  This year we were fortunate to have an absolutely beautiful Halloween night.  This worked out well for me since this is the first Halloween costume I've made for him that is not made out of polar fleece. 
Ike decided that he wanted to be a wizard for Halloween and I must admit that it took me a little while to clue in as to what he might think a wizard costume might look like compared with what I might come up with.  After a week of mulling over ideas in my head....it dawned on me that Ike's only 'experience' with wizards would be the Harry Potter movies.  Good thing I asked......because what he really wanted was a Hogwarts Student costume.  Vastly different than the shiny blue Merlin concoction that was brewing in my imagination.
This costume was really a fun one to make and is the first costume that I have bothered to buy a pattern to start with.  I purchased the McCalls 5952 pattern and found it to be extremely simple, a nice first time pattern with only 4 pieces. I modified it only slightly, taking 10 inches off the depth of the sleeve at the wrist, also making the back of the hood more 'pointy' and adding a wand pocket on the inside left side. I lined the hood with a wine coloured fabric similar to the Gryffindor colours from the later movies and ordered a Hogwarts crest from Ebay.  I found instructions here on making a Chinese Button Frog closure  to close the front of the robe.  I planned to remove the ties at the neck, but Ike decided he wanted to keep them as well.  Thinking ahead to next year, I made the robe a little on the long side.  The rest of the costume came together from thrift store finds and from our closet.  A mans medium grey V necked camel hair sweater to felt down to size, a boys white dress shirt, a tie of burgundy  and gold, and black pants finished off the outfit.  Two hot wash cycles with a few pairs of jeans, followed by a trip through the dryer made the mans medium camel hair sweater a little warmer and........just the right size!
Time permitting I decided to think about a Gryffindor scarf and DH thought about the wand.  The scarf took a bit of time fussing with the knitting machine to produce it and DH did the most marvelous job on the wand.  I think the whole wand construction took only 1/2 hour and cost $5 in parts, with parts to spare to make another.  It is constructed with an eleven inch section of oak dowel, a wooden handle for a pail, and a wooden ball.  DH drilled out the center hole of the pail handle and wooden ball using the drill press, to match the diameter of the dowel.  The dowel runs through the pail handle and into the wooden ball and is all glued together.  He also tapered the dowel slightly with sand paper on his drill press.  He then stained the working end of the wand and shellacked the handle end, lastly covering all in four coats of spray varnish.  I think Ike is likely to get a lot of use out of this one:)  After printing out the list of Harry Potter Spells from the internet......there was a lot of practicing!
We had a perfectly great Halloween here even though DH missed out as he had a course to attend out of town:(  Grampa, who is visiting, helped out lots with Ike's pumpkin carving and with the knitting machine too!