Saturday, November 29, 2008

Daring Bakers Challenge #3 Caramel Cake

It's month three with the Daring Bakers Challenge and I'll admit I was really quite a little disappointed that the savoury recipes had stopped and we were back to the sweets. Don't get me wrong......I like sweets as much as the next person......well probably more.....maybe even a lot more....but that's another story. In any case..... this months recipe for Caramel Cake with Caramelized Butter Frosting, the signature cake of Shuna Fish Lydon of Eggbeater, was on the agenda. This months hosts were Dolores, Alex, and Jenny with some gluten free input from Natalie from Gluten A Go Go.
As it happens, my disappointment was short lived as I can honestly say I LOVED both the cake and the frosting recipe. I did have trouble with the caramel syrup. I made it the day before as it needed to cool before it could be added to the recipe. It made up beautifully and with out incident.....but the next morning I could see sugar crystallization occurring in the syrup. I used it anyway.......and the recipe turned out absolutely beautiful. I chose to make the cake into cupcakes as I had seen a few people had tried this already and in the interest of sharing ease it was the best option for me. Well......the cake was spongy, moist with a nice fine crumb, and I will definitely be making this one again and quite possible again. I did not use the unsalted butter called for in the recipe as there was no way I was going to spend $6 for butter for a untried recipe, and given the how it turned out so well.....I still wouldn't. I cut back on the salt amount listed in the recipe and obviously I also used the same butter for the frosting and even found I needed to add a pinch more salt.....so it all turned out quite well. I loved the frosting! No question it is extremely sweet....but it had a delicious hint of caramel from the syrup and a wonderfully noticeable flavour from the browned butter. The icing recipe made just enough to frost the 24 cupcake the recipe made. The flavours of this recipe are sweet and subtle and I could not think of another add in that I wanted to add that would not detract from the its simple deliciousness. I brought a plate of cupcakes over to the neighbours. I'm sure I'll soon hear if I am alone in my love of these little cakes.

So, here it is.......THE RECIPE..... click on it, should you chose to try it....And I say "Alison you have got to try this"!

Thursday, November 27, 2008

Handmade Holidays Idea #6 Everybody Loves Candy

Candy is always a perennial favourite. It can be quick, easy, and fun too! Here are some of our standby candy recipes that we commonly make for the holidays. Funny, that I really never make these recipes throughout the rest of the year. There are lots of nice packaging options available at this time of year. The traditional Chinese take out container has to be one of my favourites!

Sponge Toffee

1 cup sugar
1 cup dark corn syrup
1 tbsp white vinegar
1 tbsp baking soda, sifted

Line an 8 or 9 inch square cake pan with foil. Generously butter the foil. Combine the sugar, corn syrup and vinegar in a heavy deep sauce pan. Stir over medium heat until the sugar dissolves. Continue to heat without stirring until thermometer reads 300F, swirling the pan occasionally. (about 18 minutes) Remove from heat and immediately add the baking powder and stir to combine well. Quickly pour into prepared pan. Cool completely. Lift out of pan using the foil edges. Cut or break into large pieces. Store in an air tight container. Small bite sized pieces are delicious dipped in chocolate coating. This is a really fun recipe to make with kids as it really foams up when you add the baking soda. But remember that the candy is hot and be careful not to get burned!

Almond Roca

1 cup butter
1 cup sugar
3 tbsp water
1 tsp light corn syrup
1 cup finely toasted almonds
1 cup milk chocolate chips

Melt butter in a medium sauce pan. Add in the sugar, water, and corn syrup. When the sugar dissolves and the mixture begins to boil raise the heat and bring to 290 F on a candy thermometer. Quickly stir in 1/2 cup chopped toasted almonds. Immediately pour onto a baking sheet lined with foil. After 2-3 minutes sprinkle the top of the candy with the chocolate chips and let them soften for a few minutes. Once softened, spread them in a smooth layer over the candy. Then sprinkle with remaining chopped nuts. When the chocolate has hardened, crack candy into pieces and store in a covered container.

Clodhoppers Candy

3 cups white chocolate melt wafers
2-3 cups cashews chopped
2 cups golden grahams cereal crumbled

Melt wafers in a double boiler. Crush cereal in a zip loc type bag until pieces are slightly smaller than 1/4 inch. For the cashews I usually buy a tin of broken cashew bits and further process them to a little smaller size. Not too much though. Add nuts and cereal to the melted wafers and stir to coat. Pour out onto cookie sheet and chill to set the chocolate. Once hard, break into serving sized pieces and store in a covered container. This recipe is also good with milk chocolate wafers substituted for the white melt wafers. Dried cranberries is also a nice addition.

Tiger Butter Fudge

1 lb of white chocolate
1 lb milk chocolate
3/4 cup peanut butter

Chop chocolates and set to melt in separate bowls. To the melted white chocolate add the peanut butter and stir until smooth. Stir the milk chocolate until smooth.Line a 8 X 12 inch pan with waxed paper. Pour in the milk chocolate. Pour in the white chocolate and peanut butter mixture randomly over the top of the milk chocolate layer. With tip of a knife, drag it through the surface of the candy making a swirling marbled pattern over the entire surface. Be careful not to get carried away swirling or you will mix it in too much and not keep a marbled appearance. Chill until firm. Slice at room temperature.

Saturday, November 22, 2008

Handmade Holidays Idea #5 Mixes


Handmade Holiday ideas continue with mixes. Over the years we have tried a few of these. We have tried drink mixes, brownie mixes, popcorn seasoning, dip mixes and even dog biscuit mixes. A quick google search will get you a list of mix options in no time at all.......but here are some recipes that we have tried over the years.

Drink Mixes

Hot Cocoa Mix

2 cups powdered milk

1 cup sugar or (splenda sugar substitute)

3/4 cup cocoa

1/2 cup non dairy coffee creamer

Add all ingredients together in a food processor and process until mixture is powdered.

*To make raspberry cocoa, replace 1/2 of the sugar with raspberry powdered drink crystals.

*To make mint cocoa, add 6 hard peppermint candies and process. Use sugar free if you are making sugar free cocoa mix. To serve, add 2 heaping tbsp of mix to a cup of hot water.


Toffee Coffee Mix

1 cup instant coffee

2 cups milk powder

1 cup powdered non dairy creamer

1/3 cup cocoa

1 cup brown sugar

1/2 cup white sugar

1/4 cup instant butterscotch pudding mix


Mix all together in food processor until finely powdered. To serve, add 2-3 heaping tsp to a mug and fill with boiling water.


Vanilla Spice Latte

1/2 cup instant coffee

2/3 cup sugar

1/2 cup powdered milk

1/4 cup dry non dairy creamer

1 tsp cinnamon

1/4 cup vanilla instant pudding mix


Mix all together in food processor until finely powdered. To serve, add 2-3 heaping tsp to a mug and fill with boiling water.


Dip Mixes

Garden Herb Dip


1T dried parsley

1 tsp dried dill

1 tsp granulated garlic

1/2 tsp dried rosemary

1/4 tsp dried sage

2 T dehydrated onion

3-4 T dehydrated carrot, celery, scallions


Mix all together and store in Ziploc bag until needed. To make, use 3-4 T of dip mix and mix into 1/2 cup mayonnaise and 1/2 cup sour cream or yogurt. Mix well and let sit in refrigerator for 2 hours before serving. If you cannot find dehydrated carrots, celery and scallions......you can make your own by mincing vegetables and placing them on a baking sheet in a 250 F oven for 45 minutes. Watch them carefully to make sure they dry completely but do not brown.

Ranch Dip Mix

1 1/2 T dried parsley

1 1/2 tsp dried chives

3/4 tsp dried tarragon

1 1/2 tsp lemon pepper

1 T salt

3/4 tsp oregano

1 1/2 tsp garlic powder

Mix all together in a medium bowl and keep in ziploc bag until needed. For dressing, whisk 1 tsp dip mix together with 1/2 cup mayonnaise and 1/2 cup butter milk. Refrigerate 1 hour before serving. For a dip, Combine 2 tbsp mix with 1 cup mayonnaise and 1 cup sour cream or lowfat yogurt. Refrigerate 2 hour before serving.


Special Brownie Mix

3/4 cup flour

1/2 tsp baking powder

1/2 tsp salt

1/2 cup cocoa powder

3/4 cup sugar

1/2 cup brown sugar

1/2 cup white baking chips

3/4 cups chopped walnuts

1 50 mL bottle of liqueur like Baileys or Grand Marnier

Layer all ingredients in a one quart jar and screw lid on. Attach liqueur bottle with ribbon. Include directions.....

Preheat oven to 350 F. Grease bottom of 8inch or 9 inch square pan. Melt 1/2 cup butter or margarine. Beat melted butter, two eggs, and the liqueur in a medium bowl until blended. If you are not using the liqueur substitute it with 1/4 cup water. Stir in brownie mix. Spread batter in prepared pan and bake 30-35 minutes for 8 inch pan and 25-30 minutes if using a 9 inch pan or until toothpick inserted in center comes out clean. Cool and slice into 16 squares
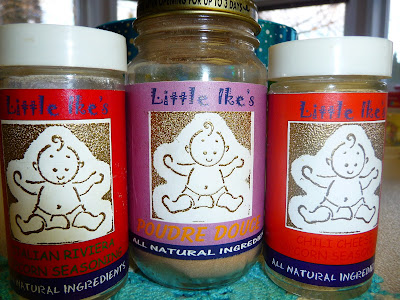

Popcorn Seasonings

Chili Cheese

1 1/2 tsp chili powder

1/3 cup powdered cheddar cheese

1 tsp garlic salt

1/8 tsp cayenne pepper

Combine all in a small bowl. Spoon into small jars with tight fitting lid. Makes 1/3 cup.


Mexican Blend

1 1/4 oz (one envelope) taco seasoning mix

1 tsp dried oregano

1/2 tsp basil

3/4 tsp garlic powder


Combine all in a small bowl. Spoon into small jars with tight fitting lid. Makes 1/3 cup.


Mediterranean Blend

1 tsp chili powder

1 1/2 0z ( one envelope) of spaghetti sauce mix

1 tsp sugar

1/2 tsp garlic salt

1/4 tsp cayenne pepper

Combine all in a small bowl. Spoon into small jars with tight fitting lid. Makes 1/3 cup.

Dog Biscuits

1 3/4 cups flour

1 cup whole wheat flour

1/2 cup rye flour

3/4 cup corn flour

3/4 cup bran

2 T kelp

2 T wheat germ

1 cup corn meal

2 T garlic powder

1 T parsley

1 1/2 tsp rosemary

1 T beef soup base powder

2 T skim milk powder

2 T instant yeast

Mix all together. Divide dry mixture into two equal portions. To prepare biscuits, add 1 cup tomato or vegetable juice to one portion of dry ingredients to make a stiff dough. Add an additional 2 T of water if necessary. Roll out dough, cut shapes and bake in a 300 F oven for 1 hour. Turn off oven and leave in oven to dry.


As with all handmade gifts, the trick is in finding the right packaging or presentation. The coffee and Hot Chocolate mixes fit nicely into empty tins from General Mills 'Internationals Coffee'. I just printed up some paper labels to wrap over the sides of the tins. If your house is tidier than mine because you actually throw things out, you may not have any empty coffee tins laying about.......in which case a quick trip to the paint store may be in order. You can purchase empty paint tins there in a size you feel is appropriate and than print up your own custom label or decorate the tin in a scrapbook style.

For the dip mixes, I found the tall size baby food jar worked very well, and again if you don't have these floating around your house, there is probably a new mom in the neighbourhood who would love to part with some. For baby food jars, I again printed up a label to wrap around the jar and painted the lid with acrylic paints in a coordinating colour.

The brownies presented a problem for me as they are meant to be packaged in a canning jar, and I really was not overly fond of the country look associated with this packaging. I ended up packaging the brownie mix in clear cellophane bags from the dollar store, and then putting them inside a brown paper lunch bag with a personalized label glued to front and back with instructions on them. To close, I folded down the top of the bag inch, then again and punched two holes with a hole punch through the folded top about one inch apart. Run a piece of ribbon through both holes and tie in the front with a gift tag and you are done.

Popcorn seasonings were quite easy as you can purchase empty spice bottles from the bulk section of the grocery store or from your dollar store quite easily. Again a simple label from the printer and you're done. All my label making has been done with regular white paper which I cut to size and wrap the container with about a 1 cm overlap. Just enough to glue it in place. If you have scrap booking supplies at your disposal, two way tape will work well too.

The dog biscuit mix was packaged in the same fashion as the brownie mix with the addition of a bone shaped cookie cutter which I tied to the top of the bag closure.

Well, there are a few more ideas for you. Mixes are generally quite quick to prepare especially in larger numbers as you get a bit of an assembly line going.


Thursday, November 20, 2008

Handmade Holidays Gift Idea #4 Knit & Felt Slippers


Handmade Holiday Gift # 4

This one requires some very basic knitting skills. But only very minimal ones as the felting process will hide any lack of knitting skill. I found this pattern at knitty.com and found that they could be easily knit up in just a few evenings......and of course the felting is a bit addictive. You'll need one ball of Bernat Lana or Patons Classic Merino wool or two balls of Noro Kuyreon. Any wool which has a high percentage wool (at least 85%) will do. If you catch them on sale, all the better. The Noro Kuryeon has some absolutely beautiful colourways, but is more expensive and does not felt up quite as quickly nor as thick as the Patons or the Bernat. If you are looking to do this on the cheap....you are better off with the Bernat, Patons, or Lion Wool. Those, you can get on sale at Michaels with a 50% off coupon or at least on sale most days. Here in Canada that means a cost of probably about $3.50 to $4.00. Which is really not too bad. If you go for the Kuryeon it will be more like $20.00 as it is tough to catch on sale. The Patons Classic is now available in variegated shades so we'll soon see how those turn out. I have a set on my needles right now. Another fun option is to purchase the off white wool yarn and give your hand a try at kool-aid dyeing. This is another thing on my "to do" list.......One of these days....Maybe pretty soon??? Anyway, they do knit up quite quickly and I am told wear very well. So click here to go Knitty.com and get yourself a free pattern and make yourself (or someone else) some Fuzzy Feet.....Good Luck:)


Sunday, November 16, 2008

Idea #3 Felt Covered Book

Back again with Handmade Holiday gift idea #3 for you. Here's one that's quick and easy and cute too....I think. I used to have tonnes of these free 4X6 picture albums. The kind the developing shops used to give away free with each roll of film developing. (Remember film developing???) They are usually quite junky looking so I didn't mind covering them up. What I found was that you can make a quick cover for one with felt quite easily. Felt is fun to work with because you can leave the edges unfinished as it will not fray and it is really very inexpensive. If you can find wool felt, that is even better. It will cost a little more, but your project will be more sturdy. You could also do this project with ultra suede if you are lucky enough to be able to get some and this would be the most sturdy option but also a little more expensive. I just happen to have a pile of acrylic felt that needs to be used up, so that's what I'm using today. I also happened to find a stash of these photo albums for 19 cent each at my local liquidation world, so I stocked up on them. Once you are finished with this project, you can use it as a photo album if you like, but I've found that I like to fill them with 4X6 recipe cards and give them away as little recipe books. It works out pretty well as each recipe is inside the little plastic sleeve and is protected from spills and splashes etc. You could also use them like a mini scrap album too.

So to start with...you'll need a cheapy little photo album like this one, two sheets of felt for the cover, some felt scraps, some embroidery floss for embellishment and a needle.......You could try your local dollar store, Walmart or Michaels for all of these supplies.

Then, open it up and take it's measurement. Mine measured 9 1/2 inches by 6 3/8 inches when open. The fabric needed to cover this book will have to be slightly larger to allow for seam allowances. So...... add 1 inch to the shorter side, and 1 1/4 inches to the longer side. I added a little extra ease (1/4 inch extra) to the longer side since this side will need to bend around the spine of the book and you don't want it to be tight. This means in my case I needed to cut my felt out to be 10 3/4 inches by 7 3/8 inches. You will also need to cut two pieces of matching felt for the inside flaps. Cut these to be the same width as your cover piece, and tall enough to cover a good way up the page. In my case this was 2 pieces cut out 3 1/2 inches by 7 3/8 inches. You can decorate the front of your book in any way you see fit. Keep in mind where the cover will be folded, and arrange your design accordingly. I have chosen to embellish the book front with blanket stitched shapes and some embroidery like this.......I did all my embroidery with 3 strands of embroidery floss.


Once you are satisfied with your cover design, then you can machine sew the inside flap pieces to the ends of your cover piece using a 3/8 inch seam allowance along the three outside edges of each flap, wrong sides together like this.......

To finish, if you'd like, clip along the edges with pinking shears and you are done! If you are opposed to machine sewing, you could sew the flaps on using a blanket stitch with a coordinating embroidery thread. This would have a more country look which is cute too, and would look very similar to the wool felt needle books I made here. Now you have a felt covered book ready to fill with photos, recipes or what ever you might like to gift. My project cost for materials was under $1 and it took a little bit of time depending on how much you wanted to embellish the cover. I spent about an hour watching TV and embellishing this cover. This makes a nice little gift filled will family recipes for those kids leaving the house or newlyweds starting out or anyone who just likes to cook. Of course you could use it as a photo album or fill it with craft pattern instructions written on 4X6 cards, or instead of starting with a photo album, you could start out with a blank journal.....you see.......lots of possibilities:)

Wednesday, November 5, 2008

Handmade Holidays Idea #2 Baked Goodness


Now who doesn't love home baked cookies??? Most people like to have home baking around for the holidays, but not everyone likes to bake themselves. So if you don't mind baking, why not make someones day with some serious home baked goodness. Here's a recipe that is perfect for the holiday season. It's easy, it keeps well, looks beautiful, and is just right for the Christmas Season. Of course it's all in the presentation, but do make it a tightly sealed container as these are a delicious chewy cookie and you want them to stay that way. I had not made this recipe in over 25 years, and today I made them.......and they were as good as I remembered and I'm so glad I made them again. I think you might be too.......Go on...you know you waaannnnaa.


Ginger Sparkles

Ingredients
1 1/2 cups butter
2 cups sugar
2 eggs
1 cup molasses
1 teaspoon vanilla
4 1/2 cups flour
4 teaspoons baking soda
2 teaspoons baking powder
1 teaspoon salt
2 teaspoons cinnamon
1 teaspoon ground cloves
1 teaspoon ground ginger


In a large bowl cream the butter and sugar. Add eggs, molasses, and vanilla and mix well. Stir in baking soda, baking powder, salt, cinnamon, cloves, and ginger. Add flour and mix to incorporate. Roll into 1 inch balls, then roll in a small dish of white sugar to coat the ball of dough. Place on cookie sheet and bake 8-10 minutes at 350 F. No need to flatten the dough balls as they will spread out as they bake. The recipe makes a whole bunch....over 80 for the one inch balls I made and is a total snap in a stand mixer.

Tuesday, November 4, 2008

Non-Commercial November

I had a conversation with a friend a few weeks ago about commercialism in North America. It seems that in North America, we do a lot of unnecessary shopping, in comparison to other developed countries. This conclusion was reached after a move to the other side of the world by my friend, and by what she noticed while settling into her new neighbourhood. The number of kids toys that her family owned was well in excess of that of the kids in their new neighbourhood. It seems that where she now lives, children are pretty much only receive toys at Christmas and Birthdays. And the comment was made that there is not nearly as much window shopping or hanging out at the mall as there is in North America. Now, at first I thought she was not thinking clearly with too much blood flow to her head.....I mean she is living upside down now....it could happen. But as I thought about it.....I could not argue that my child alone has enough toys for 4 kids... mostly because of a parent who is a gadget freak. I'm sure in general this happens in North America for the most part just because we can. I'll admit that I have a bad habit of buying things that I don't need immediately. I tend to squirrel things away as I find them on sale. This tactic is OK if you can keep track of your inventory, but really falls apart if you don't keep on top of it.
So in light of this new realization that I purchase too much junk, I've decided to have a non-commercial November. For the month of November, I'll be trying to not purchase anything other than the basics. No new toys for Ike, no hot crafting supplies on clearance. I'm even going to try and use up all the stuff deep down in the bottom of my freezer!
Your probably thinking......"no spending in November with Christmas coming up???"......that's just crazy isn't it! So it I'll be posting my Handmade gift giving suggestions through the month of November to help give you some less expensive options than buying gifts from the store.
To start out with, how about a homemade Salt Scrub? I love these and find no difference in what you buy in the store vs what you can make at home. In fact, I made some last night. This one is so easy it's an ideal gift for kids to make for mom or teacher. You just might want to supervise the addition of the essential oils.


Handmade Gift Idea #1

Salt & Sugar Scrub

1 cup Sea Salt
1/2 cup brown sugar
1 cup grape seed oil
1 tsp glycerin
10 drops essential oil or fragrance oil

Mix all together to combine. You can start with less than the recommend amount of oil and add all or more if you feel it's necessary. I've used sugar scrubs before and have a preference for the salt scrub as I think the sugar scrubs dissolve much too quickly. You may want to pulse the sea salt a little in a food processor to reduce the particle size a little bit. Chunks that are too big will just fall away from your hand when you go to use them anyway. You can use coarse pickling salt if you happen to have some of that, and substituting in some Epsom salts will work as well.

The batch I made last night is scented with peppermint for the holidays, and tinted green with some spirulina powder that I had in the cupboard. Once you've finished the mixing then you just need to find a pretty container to put it in...... Something with a well fitting lid so the oil won't leak out. A nice little gift tag, and a bit of ribbon and you're done. Perfect for girlfriends or teachers gifts. Your cost to make this is about $2, compared to $8 for the store bought version.

What kinds of things has your family tried for a Handmade Holiday Gift?? Leave a comment......I'd love to hear your ideas.

Sunday, November 2, 2008

Congratulations Shannon the Coffee is on Me

This morning we picked a winner for the Canadian Tim Hortons Gift Card. The winning comment was chosen by a random number generator and was comment 15. Congratulations to Shannon....your Gift Card will be in the mail soon.

Random Integer Generator

Here are your random numbers:

15 

Timestamp: 2008-11-02 16:39:05 UTC


Thanks to everyone who participated. See you all next time:)

Saturday, November 1, 2008

Goodbye Great Pumkin:( ....See you Next Year

Now that Halloween is behind us (and it was a great Halloween this year as far as weather goes) it's on to the next major Canadian holiday. Christmas! Halloween and Christmas have to run a pretty close tie at our house and we might even decorate a little more for Halloween come to think of it. And I think if you'd ask the average kid here which was more fun, Christmas or Halloween, it would be a pretty close tie as well, as they are very much enjoyed events here. I mean who wouldn't love an all night costume party where you get to pretend to be something you're not, running around in the dark........ Now that's just FUN 'on steroids' isn't' it?....Well it is if you're a kid......or a kid at heart. There is no doubt that Halloween has become more commercialized here and people are moving away from putting together homemade costumes and more are purchasing off the rack costumes.......I think it's really sad when peoples lives are too hectic to spend the time working on a project like this with their kids. But before we say goodbye to Halloween 2008, here's a few photos to share with you from our Halloween Day.

This is the pumpkin Ike Carved (I helped at times) from a free Pumpkin Masters pattern.
Here is Ike cleaning out the Pumpkin getting ready to carve it.

Trying on last years costume and giving it a spin.

These are some of the tomb stones decorating our entrance way.


More Stones...............

And some more.......................................We made these many years ago using Styrofoam insulation which we cut into the shape we wanted, then engraved them with funny but actual real epitaphs. We used a drawing package, but you could use word, to write the epitaph in full size. We printed out the writing and tacked it to the front of the stone and either melted it in with a soldering iron by burning through the paper and into the Styrofoam, or in later years using an exacto knife to cut through the paper and into the Styrofoam. The soldering iron method gave off what I'm sure were terribly unhealthy fumes so my preference now is using the exacto knife. You could also use a dremel tool, but it would raise a lot of dust that you would not want to inhale. After engraving, the engraved areas were painted with medium dark grey latex paint while the surface over the rest of the stone was painted with an off white since it's what we had at the time. Then we used spray paint meant to create a granite speckled finish and finished with a few coats of spray varnish. I've seen instructions to drill holes up into the bottom of the stones to place stakes in to attach them to the ground, but we have not bothered with this since we always put them in the dirt. We just bury them in a few inched of earth. Usually we set out wooden frames lined with landscaping fabric in the shape of a grave plot and put a few of them on the lawn piled with fresh earth to make a few fresh graves. But since this year was promising rain we opted not to.


This is a shot of the front of the house.


This is the front door and a shot of Ike's pumpkin. Behind the black curtains are skeletons and black lights.


Neighbours glow in the dark decoration.


Another Neighbours entrance way. That's Ike in his Turtwig costume going to the door.


This neighbour had a 100 lb pumpkin on their doorstep.
Out for a walk after Halloween and there were still some decorations up in the neighbourhood.

Bye Bye Little Birdie

The little birdie felted purse will soon be flying south for the winter to it's new home. The winner (comment 88) was chosen by a random number generator. Thanks to everyone who participated! Maybe we'll see you again next time.

Random Integer Generator

Here are your random numbers:

88 

Timestamp: 2008-11-01 17:14:07 UTC

That's Michelle Chappell. Congratulations Michelle! Check out Michelle's photography skills if you have a minute. She does beautiful childrens portraits you really should go check it out!